
A good itinerary is more than a list of places you want to see. The route has to make sense, the logistics have to work, and the pace has to fit the way you actually want to travel.
This is where the practical pieces come together — deciding how much to fit in, how to get around, where to base yourself and when spending a little more can make the trip noticeably better.
Build the Trip
Routes, pacing and deciding what actually fits.
How many nights do you need? Which stops belong together? When does adding one more place make the whole trip worse?
This section focuses on building realistic itineraries around your priorities rather than trying to fit everything in.
Typical content
- How many days or nights
- Route and itinerary decisions
- What to cut
- Day trip versus overnight
- Itinerary reality checks
How to Actually Do It
The practical details between the highlights.
Getting from one place to another can take more time, money and patience than an itinerary suggests on paper.
This section covers the real logistics — transport, transfers, tickets, bookings and what the journey is actually like.
Typical content
- Point-to-point transportation
- Ferries, trains and flights
- Transfers and border crossings
- Booking processes
- Actual versus advertised travel time

Where to Stay and Why
Choose the best base that works for the trip you want.
Where you stay can change how easily you explore a place, how much time you spend in transit and even what the destination feels like.
The focus here is not long lists of hotels. It is understanding the trade-offs between locations and choosing a base that fits your priorities.
Typical content
- Choosing an area or neighbourhood
- Central convenience versus atmosphere
- Staying overnight versus visiting
- What worked about places we actually stayed

Travel Smarter
Make the practical side of travel work better.
Some decisions are not tied to one destination at all. Packing, costs, booking strategy and travel systems can make the difference between a trip that feels manageable and one that constantly creates friction.
Typical content
- Packing and gear
- Real costs and budgeting
- Booking strategy
- Connectivity and money
- Insurance and travel systems
- Long-trip practicalities
Start with the way you travel
The practical answer is not always the same for everyone. A packed route may suit one traveller and exhaust another; paying for convenience may feel wasteful to one person and completely worthwhile to someone else.
Latest planning articles
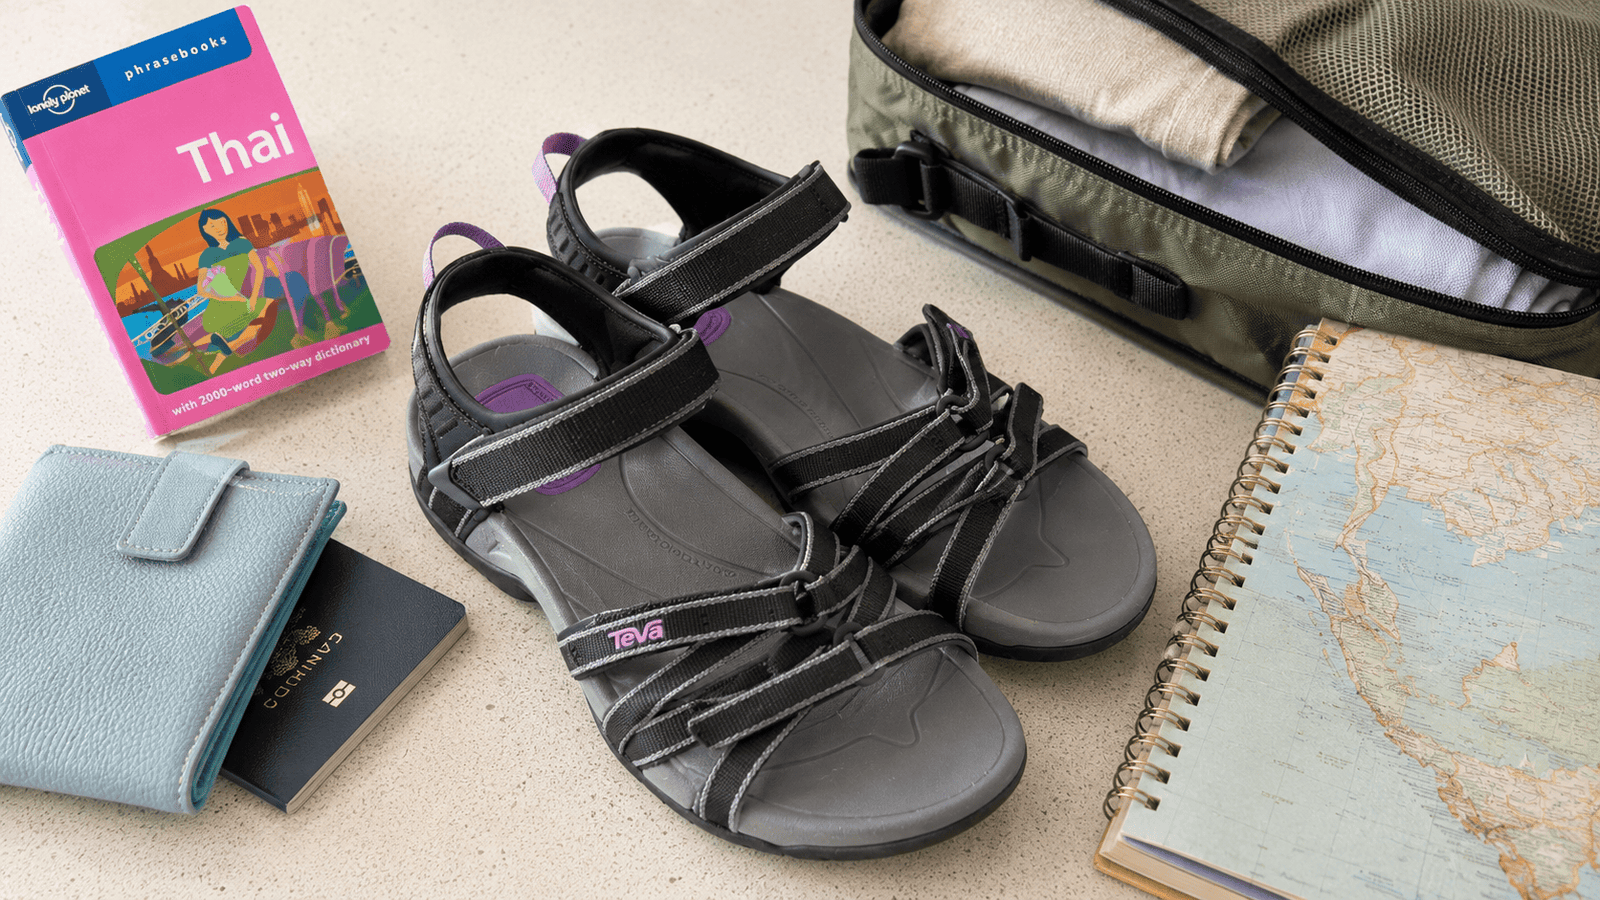
I wanted one sandal that could handle substantial walking, heat, water and everyday city use in Southeast Asia. After trying several options, I chose the original Teva Tirra — while accepting that it would not replace every other shoe.
Choosing shoes for a four-and-a-half-month trip has been surprisingly difficult.
We are travelling through hot and humid parts of Southeast Asia before finishing in Japan in April and May, including some cooler alpine areas. I also want to travel carry-on only, which makes bringing shoes for every possible situation unrealistic.
Originally, I hoped to solve the problem with just two pairs: a substantial sandal that could handle almost everything, plus lightweight flip-flops for beaches and pools.
That plan did not survive the shoe-testing stage.
I eventually chose the original Teva Tirra as my main warm-weather walking sandal. It should cover most city days, sightseeing, lighter hikes and wet activities in Southeast Asia. But choosing it also meant accepting that I will probably need a third pair of shoes for situations where I want a covered toe, more protection or warmer footwear.
For me, that trade-off was better than trying to make one shoe do everything badly.
The quick decision
Why I chose the original Tirra
Immediate comfort, more adjustability around my foot, enough support for substantial walking, water-friendly construction and a less technical appearance than some alternatives.
The compromise
Open toes and limited protection mean I still want a covered shoe for rougher trails and cooler weather.
Who might choose differently
Someone with a narrower foot may prefer the Tirra Sport; someone prioritizing protection may prefer a closed-toe option.
What I needed from a travel sandal
The main reason I wanted a substantial sandal was simple: Southeast Asia will be hot.
I expect to do a lot of walking, and I did not want my only choices to be a fully enclosed shoe or a minimalist flip-flop. The flip-flops I am bringing are really for beaches, pools, walking around accommodation and short trips out for coffee or food. I would not want to rely on them for a full sightseeing day.
The main sandal therefore needed to be comfortable enough for substantial walking, supportive, relatively packable and secure on my foot. A heel strap was important because I wanted something that felt locked in rather than loose.
Water resistance was another advantage. We are likely to encounter beaches, waterfalls, wet paths and plenty of rain, so a shoe that does not immediately become useless when it gets wet makes sense.
I also wanted something that could look reasonably normal with everyday clothes. It did not have to be dressy, but I preferred a sandal that felt a little less technical if I wanted to wear it to a restaurant or around a city in the evening.
That combination narrowed the field more than I expected.
I originally though the Keen Hyperport would solve the problem
My original plan was the Keen Hyperport plus flip-flops.
On paper, it seemed almost ideal. It offered more toe protection than an open sandal, looked suitable for water and walking, and potentially could have handled enough different situations that I would not need a third pair.
Unfortunately, comfort overruled the spreadsheet.
I ordered the Hyperport and wore it around the house, but it rubbed the inside of my foot unless I wore socks. That defeated much of the purpose. I specifically wanted a shoe I could wear comfortably without socks in hot weather.
I could probably have tried to break it in and hope the rubbing improved, but for a trip this long, I do not want to start with a shoe that already requires me to make excuses for it.
The other sandals I tried
I tried several different options before settling on the Tirra.
The Keen Rose was too narrow and tight on my foot. The Leika sandal was comfortable, but I preferred having more adjustment points so I could fine-tune the fit.
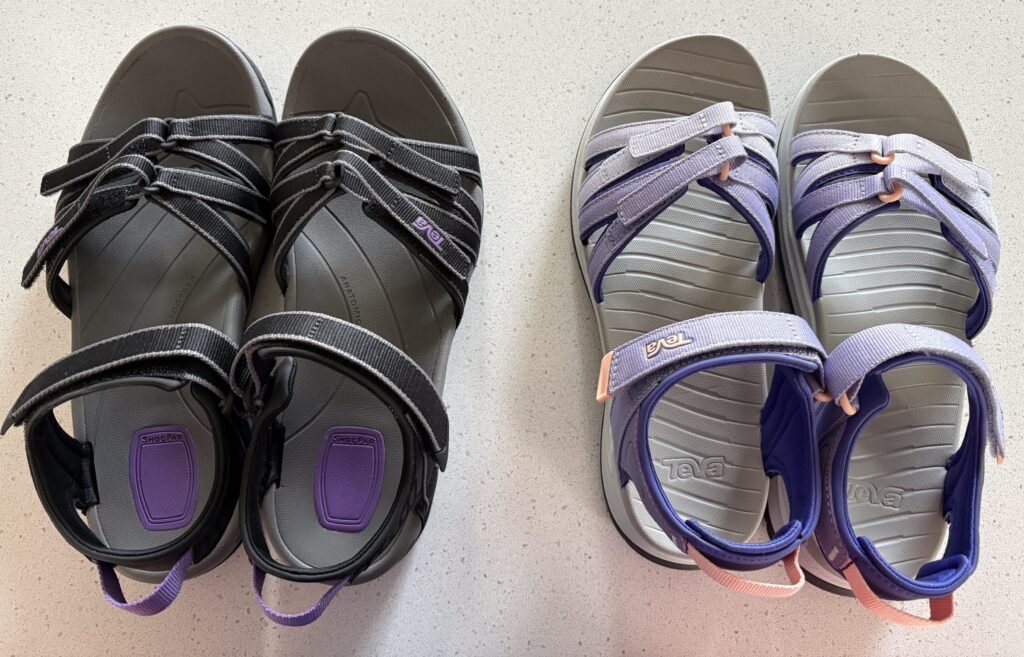
I also tried Teva’s newer Tirra Sport model. I actually really liked it. It was comfortable and I preferred its appearance, but the fit seemed narrower than the original Tirra.
I bought the Tirra Sport initially, then ordered the original Tirra to compare them. Once I had both, the original won because I had more room to adjust the straps around my foot.
I also tried the Teva Hurricane. The footbed itself felt very comfortable, but the strap placement rubbed almost immediately in the store. If I can feel a potential problem during a brief fitting, I am reluctant to assume it will disappear after several hours of walking.
The original Tirra was the pair that did not create an obvious problem I needed to solve.
How the sandals compared for me
This is a fit and decision comparison based on the pairs I personally tried, not a specification ranking.
| Shoe | What appealed to me | Main trade-off for me |
|---|---|---|
| Teva Tirra Original | Adjustable, comfortable immediately, roomier fit on my foot | Open toe means another shoe is still needed |
| Teva Tirra Sport | Comfortable and I preferred the appearance | Felt narrower on my foot |
| Teva Hurricane | Comfortable footbed | Strap placement rubbed almost immediately |
| Keen Hyperport | More toe protection and potentially more versatile | Rubbed the inside of my foot without socks |
| Keen Rose | More protected feel | Too narrow and tight |
| Leika sandal | Comfortable | Less adjustability than I wanted |
Why I chose the original Teva Tirra
The biggest advantage of the Tirra for me is adjustability.
The multiple straps give me much more control over the fit than many of the other sandals I tried. That matters when my feet are already somewhat wider and may swell after long days of walking in hot weather.
They also felt comfortable immediately. I have been wearing them around home and so far have not found any obvious pressure or rubbing points. Before the trip, I plan to take them on some much longer walks to see whether that remains true after several hours.
I also like that they sit somewhere between a purely functional hiking sandal and an everyday sandal. I would be comfortable wearing them around a city or out for dinner in a way I might not with some of the chunkier, more technical options I considered.
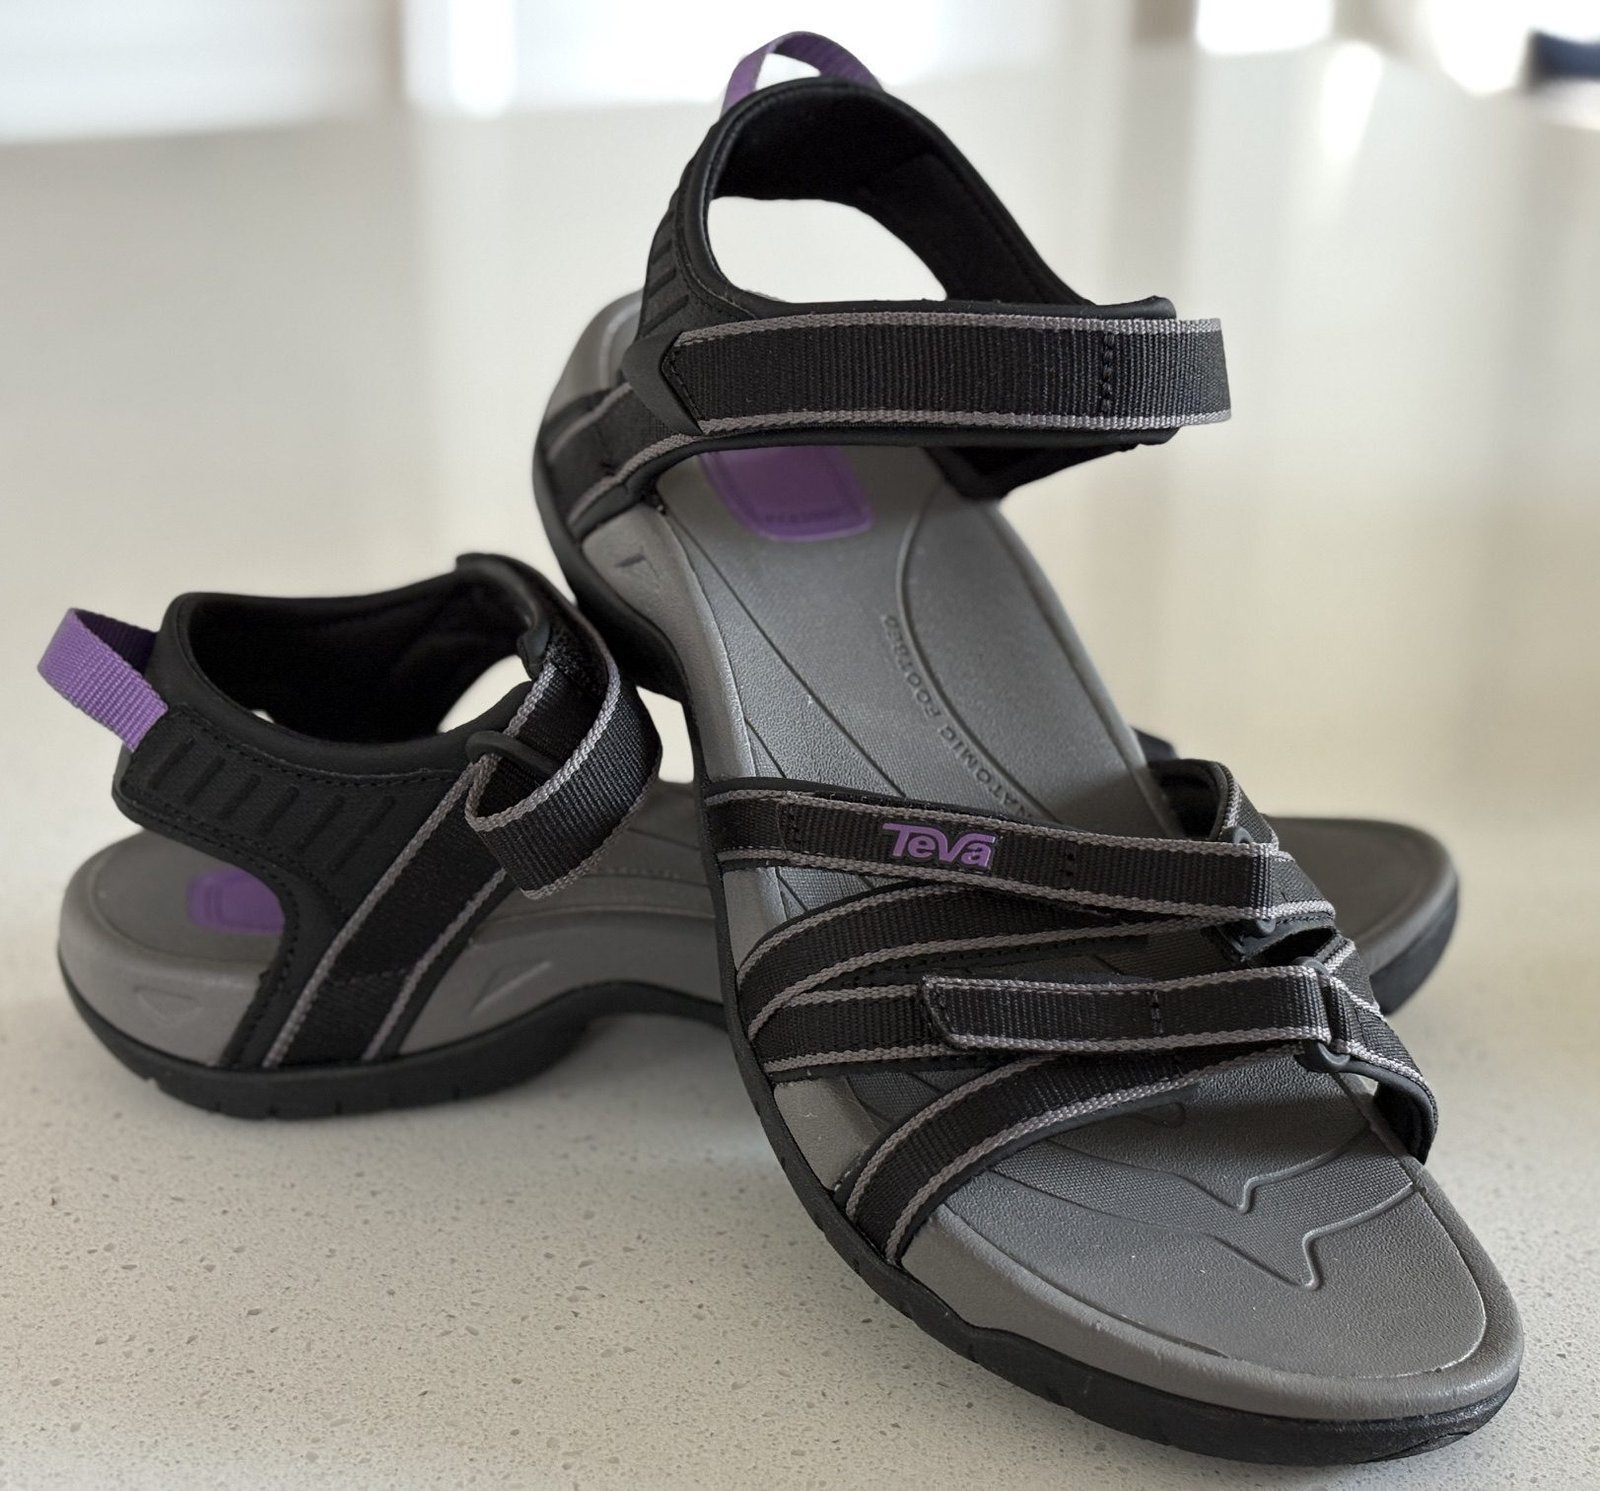
And they pack relatively easily, which matters because the footwear system only works if I can wear the bulkiest shoe in transit and fit both the Tirras and very minimalist flip-flops in my luggage.
What I still don’t know about them
Choosing a shoe before a trip and knowing whether it was actually the right choice are two different things.
My biggest question is how the Tirras will perform when wet. I like the fact that they can get wet, but I still need to find out how good the traction is on slippery surfaces and how quickly they dry in humid conditions.
I am also not convinced they are the right shoe for every Southeast Asian hike.
For relatively straightforward trails, waterfall walks and light nature activities, I expect to use them frequently. But jungle trails with sharp rocks, rough terrain or situations where I would rather have more protection from the environment are another matter.
The open toe is the obvious compromise.
Toe protection matters to me, and choosing the Tirra means accepting that I still need another shoe for situations where a covered foot feels more appropriate.
This has become a three-shoe trip
I had hoped for two pairs.
Instead, I am now planning on three: minimalist flip-flops, the Teva Tirra and one covered shoe that I have not finalized yet.
That third shoe needs to handle bigger hikes, situations where I want more toe protection, cooler weather in Japan and days when my feet simply need a break from the sandals. I already own Skechers Go Walks, but I am also considering something more flexible and travel-oriented such as the Salomon Techamphibian 5.
Three pairs sounds like more than I originally wanted to carry, but the system still feels manageable. I can wear the largest pair on travel days and pack the Tirras and thin flip-flops.
More importantly, each pair would have a different job rather than bringing three versions of the same shoe.
My planned three-shoe system
Minimal flip-flops
Pool, beach, accommodation and very short outings
Teva Tirra
Hot-weather city walking, sightseeing, lighter hikes and wet activities
Covered shoe — still to be finalized
Rougher trails, toe protection, cooler Japan and alternate footwear on long days
Why not just bring running shoes and flip-flops?
That would certainly be simpler. For a shorter trip, I might do exactly that.
But Southeast Asia is a large part of this itinerary, and I expect substantial walking in heat and humidity. I do not want to spend months choosing between wearing an enclosed shoe when I would rather have airflow or walking long distances in flip-flops that were never designed for it.
The Tirra fills the space between those two extremes. It gives me a supportive walking shoe that happens to be a sandal rather than a sandal I am hoping can survive a long walking day.
Who might make a different choice
The Tirra will not be the right answer for everyone.
Someone with a narrower foot might prefer the newer Tirra Sport that I liked but ultimately returned. Someone who wants one sandal to handle rougher trails may prefer a model with more substantial toe protection. And someone travelling only in warm cities and beach areas might have no reason to bring a third shoe at all.
I also would not choose the Tirra as my only shoe for our entire trip. By the time we reach Japan in April and May, particularly in the alpine regions, I expect to want something enclosed and warmer.
For my trip, though, trying to find one pair that could handle humid Bangkok streets, waterfall trails and cooler mountain days in Japan was probably asking too much.
The Teva Tirra does not solve every footwear problem.
It solves the one I actually needed it to solve: giving me a comfortable, supportive and relatively versatile shoe for doing a lot of walking in Southeast Asian heat.
Whether it earns that place in my bag over four and a half months is something I will only know once I have actually travelled in it.
More from this trip
- Why We’re Taking Several Months to Travel Through Southeast Asia and Japan
- How We Planned 26 Nights in Thailand Without Trying to See Everything
- Booking Ferries in Thailand: Why I Booked Direct Instead of Through 12Go
Plan your own trip
Know How You travel
Understand how pace, comfort and the number of hotel changes fit the way you travel.
Plan Your Trip
Build a route around the time, priorities and logistics that actually matter.
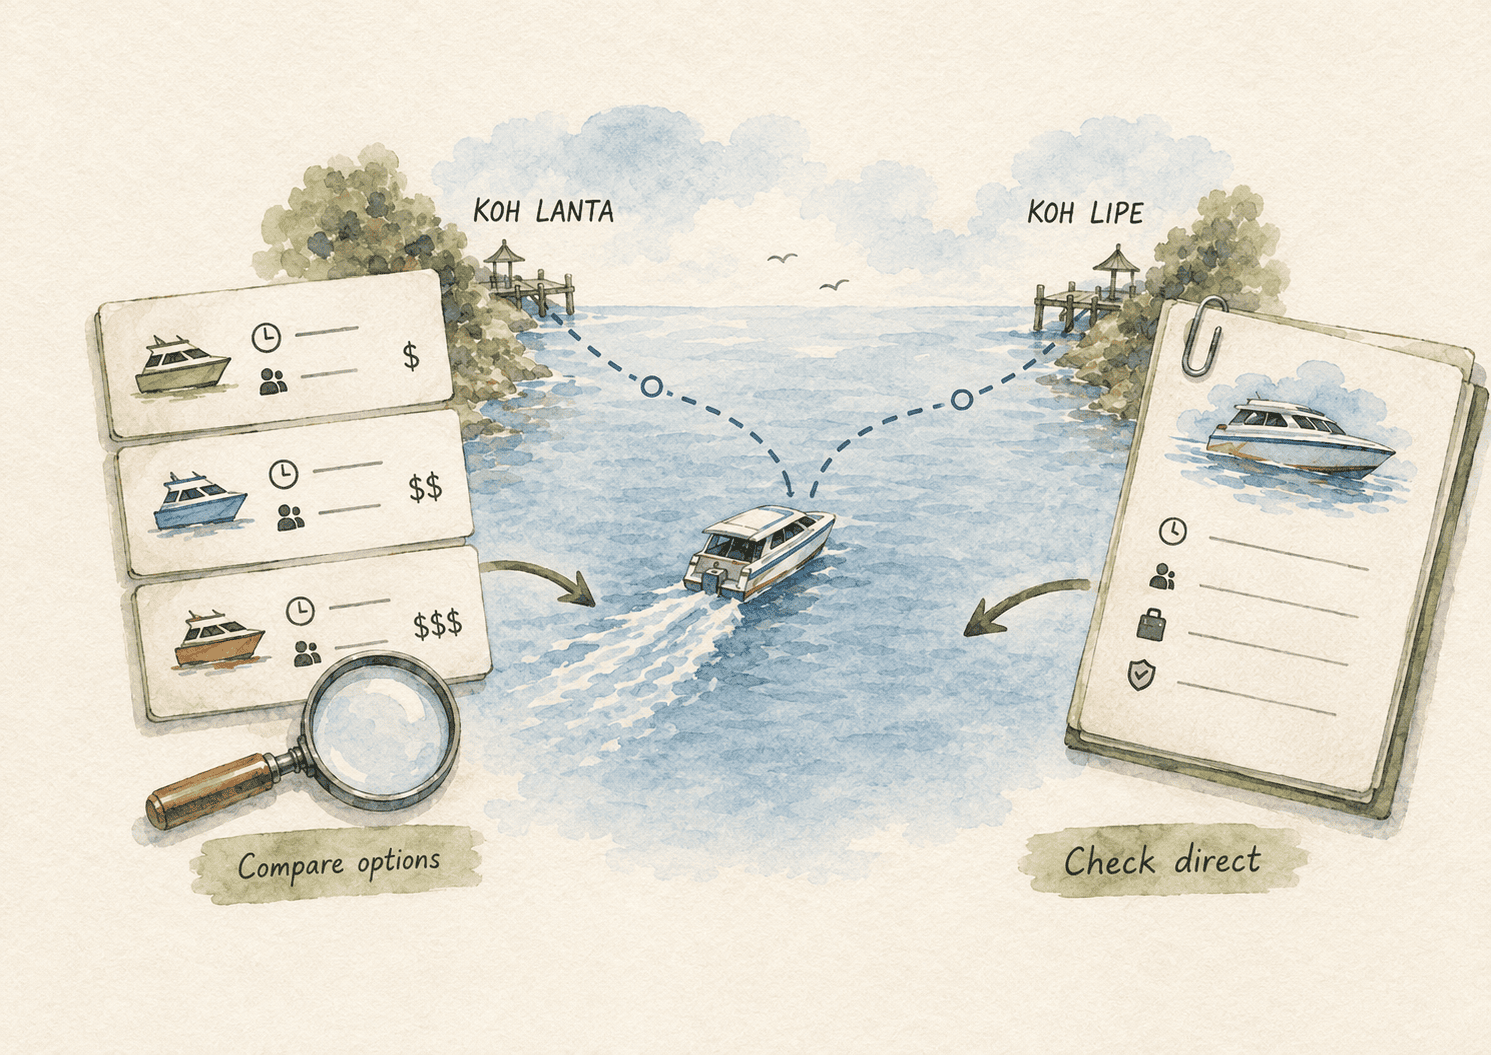
I expected to book our Thailand ferries through 12Go, but checking the ferry operator directly saved almost C$100 on one family booking. Here is how I compared the two — and when I would still use 12Go.
Booking Ferries in Thailand: Why I Booked Direct Instead of Through 12Go

When I started booking ferries for Thailand, I expected to use 12Go.
It is well known, widely used by travellers and genuinely useful for comparing transport options. For the Koh Lanta → Koh Lipe route, it showed multiple operators, departure times, traveller reviews and even photos of some of the ferries.
That made it a very good place to start.
But when I compared the exact same Bundhaya sailing on the operator’s own website, booking direct was significantly cheaper.
For our family of four, the 10:30 a.m. Bundhaya ferry from Koh Lanta to Koh Lipe was C$321.11 through 12Go. Booking directly with Bundhaya cost 5,312 baht, which came through on my Wise card at C$222.76.
That was almost C$100 less for the same operator and the same sailing.
I have now completed the booking process. Once we actually take the ferry, I will report separately on how the boarding and journey itself compare with what I expected.
Planning & Research
This comparison is based on the booking process before travel. I have not yet taken the ferry or assessed the boarding experience.
Affiliate disclosure: This article contains affiliate links. If you book or buy through one of them, I may earn a commission at no additional cost to you. This does not affect the recommendations or comparisons in the article.
Check both before booking
Book direct if…
The operator has a clear website, understandable terms and a meaningful price advantage — especially if child fares or promotions reduce the total.
Use 12Go if…
You need to compare several operators, the direct site is difficult to understand, the price difference is small, or you are comparing services that are harder to source independently. Compare current routes, operators and prices on 12Go.
What I did …
I used 12Go to research the route, then booked the 10:30 a.m. Bundhaya ferry from Koh Lanta to Koh Lipe directly because it was almost C$100 cheaper for four travellers.
Why I started with 12Go
Even though I ultimately booked direct, I would still start the research there.
12Go made it easy to see what actually operated on the route I needed. Instead of searching individual ferry companies one at a time, I could compare departure times, operators and prices in one place.
The traveller reviews were useful too. Some included details about boarding, ferry conditions and what the boats were like, which gave me more context than a timetable alone.
I also expect 12Go to be particularly useful later in the trip for things such as private transfers and taxis, where comparing several local options independently would be much harder.
Why booking direct was cheaper
For the Koh Lanta → Koh Lipe trip, the price difference was enough to make the decision easy.
One reason appears to be child pricing. The Bundhaya website clearly distinguished between adult and child fares, while the 12Go price I was seeing did not appear to give us the same advantage.
The other factor was promotions.
When I went directly to the Bundhaya Speed Boat website, I found a discount code through a pop-up on the homepage that reduced the fare further.
That code did not appear again the next time I visited the site, so if you see a promotion like that, write it down or save it before closing the page.
This is also why I would check the operator’s homepage before going straight to the booking screen. If you arrive through a search result for a specific ferry route, you may land directly on the reservation page and never see a promotion being advertised elsewhere on the site.
| Comparison | 12Go | Bundhaya direct |
|---|---|---|
| Route | Koh Lanta → Koh Lipe | Koh Lanta → Koh Lipe |
| Operator | Bundhaya | Bundhaya |
| Saililng | 10:30 a.m. | 10:30 a.m. |
| Family of four | C$321.11 | 5,312 THB |
| Amount actually charged | — | C$222.76 via Wise |
| Difference | — | About C$98 less |
| Main advantage | Easy comparison and reviews | Lower price on this booking |
| Main limitation | Higher fare in this case | Passport details requested |
Booking directly was straightforward
I would not automatically book directly with every transport company simply because the price was lower.
In this case, Bundhaya had a functioning English-language website, the booking process was clear and I could understand the cancellation and refund terms before paying. Those terms also appeared on the ticket afterward.
That made me comfortable removing the extra layer between myself and the ferry operator. If the schedule changes or I need to ask a question, there is some appeal in having booked with the company actually operating the ferry rather than through an intermediary.
If the operator’s site had been difficult to understand, looked unreliable or made the terms unclear, I would have been much more likely to use a larger platform such as 12Go even if the fare was slightly higher.
I paid in Thai baht with Wise
For the first booking, price was the decisive factor.
Bundhaya charged the transaction in Thai baht, so I used Wise rather than having my regular Canadian credit card handle the foreign-currency conversion.
The 5,312-baht fare converted to C$222.76 on my Wise card.
That is the same approach I have been using for some other Thailand bookings where the merchant charges directly in local currency. I explain that strategy more fully in Using Wise for Travel: How It Works and How I Actually Use It.
For this ferry decision, the useful point is to compare the final amount you will actually pay rather than just the number displayed on the first search screen.
The passport information gave me pause
Bundhaya asks for passport details during the booking process.
That was straightforward for most of us, but one passport is likely to be renewed before the trip, which made me hesitate before booking our Koh Lipe → Langkawi crossing.
For the domestic Koh Lanta → Koh Lipe trip, the information felt less consequential because we are staying within Thailand. The Langkawi ferry is different because it crosses an international border.
If I book that leg directly, I plan to enter the current valid passport details and then travel with the replacement passport once it has been issued. My expectation is that the passport presented to border officials at the time of travel is what ultimately matters rather than the number originally entered during the booking process.
That is something I will be able to assess more confidently after we actually make the crossing.
What I know from booking
Bundhaya requested passport information during the booking process. 12Go did not appear to require the same information at that stage.
What I have not yet confirmed
I have not yet tested what happens if a passport is renewed after booking an international ferry, whether the reservation details need to be updated, or how that is handled at check-in and immigration.
Interestingly, 12Go does not appear to require the same passport information at the booking stage. That is one factor that could still push me toward using 12Go for the Koh Lipe → Langkawi ticket.
I may use both booking methods
The price difference for Koh Lipe → Langkawi is much smaller.
For our date, 12Go is currently showing C$223.83 for four people. Bundhaya, using another promotion I found, would cost 4,628 baht — about C$195 at the market rate when I checked.
That is a difference of less than C$30 for four travellers, so the choice is less obvious. Booking direct is still slightly cheaper and keeps the reservation with the operator, while 12Go avoids the passport-information issue at the booking stage and would let me compare the two booking experiences.
Either way, this is a good example of why I would not turn “always book direct” into a rule.
How I would compare a ferry booking
1. Find the route on 12Go
See which operators and sailings are available.
2. Identify the operator and exact sailing
Make sure you are comparing the same departure
3. Check the operator’s own website
Look for direct fares, child pricing and promotions.
4. Compare the final cost and terms
Check cancellation rules, payment currency and anything else that changes the trade-off.
5. Book the option that makes more sense overall
The lowest headline price is not always the only consideration.
Why I am booking these ferries in advance
We are travelling in January, which is high season, and Koh Lipe does not have endless transport alternatives.
If the direct ferry I want sells out, the backup is not simply another convenient train an hour later. It could mean a much longer combination of ferry and overland transportation.
For that reason, once our accommodation dates were fixed, booking the major ferry legs made sense. The ferry matters because Koh Lanta and Koh Lipe are deliberate parts of our wider Thailand route, rather than standalone trips I can easily move to another week. I am happy to leave many activities until later, but I am less interested in gambling with the transport connection that makes the route itself work.
When I would book direct and when I would use 12Go
Based on the booking process so far, I would check both.
I would lean toward booking direct when the operator has a clear, trustworthy website, understandable terms and a meaningful price advantage. I would also check the operator’s homepage for promotions before paying.
I would lean toward 12Go when I want to compare several operators, when the direct website is difficult to understand, when the price difference is small, or when I am looking for services such as private transfers or taxis that are harder to compare independently.
Even when I do not book through 12Go, I would still use it for research. It has already been useful for ferry schedules, reviews and comparing transport options in one place.
For now, the lesson is simple: use the aggregator to understand the market, then check the operator before you pay. If you are still comparing options, you can check current routes and prices on 12Go, then compare the operator’s own site before booking.
On our first Thailand ferry booking, doing that saved almost C$100.
More from this trip
- Why We’re Taking Several Months to Travel Through Southeast Asia and Japan
- How We Planned 26 Nights in Thailand Without Trying to See Everything
- Using Wise for Travel: How It Works and How I Actually Use It
Plan your own trip
Know How You Travel
Understand how pace, comfort and the number of hotel changes fit the way you travel.
Plan Your Trip
Build a route around the time, priorities and logistics that actually matter.
Explore more of Thailand
Planning Thailand? Explore our current route planning, transport research and practical advice for Bangkok, northern Thailand and the islands.
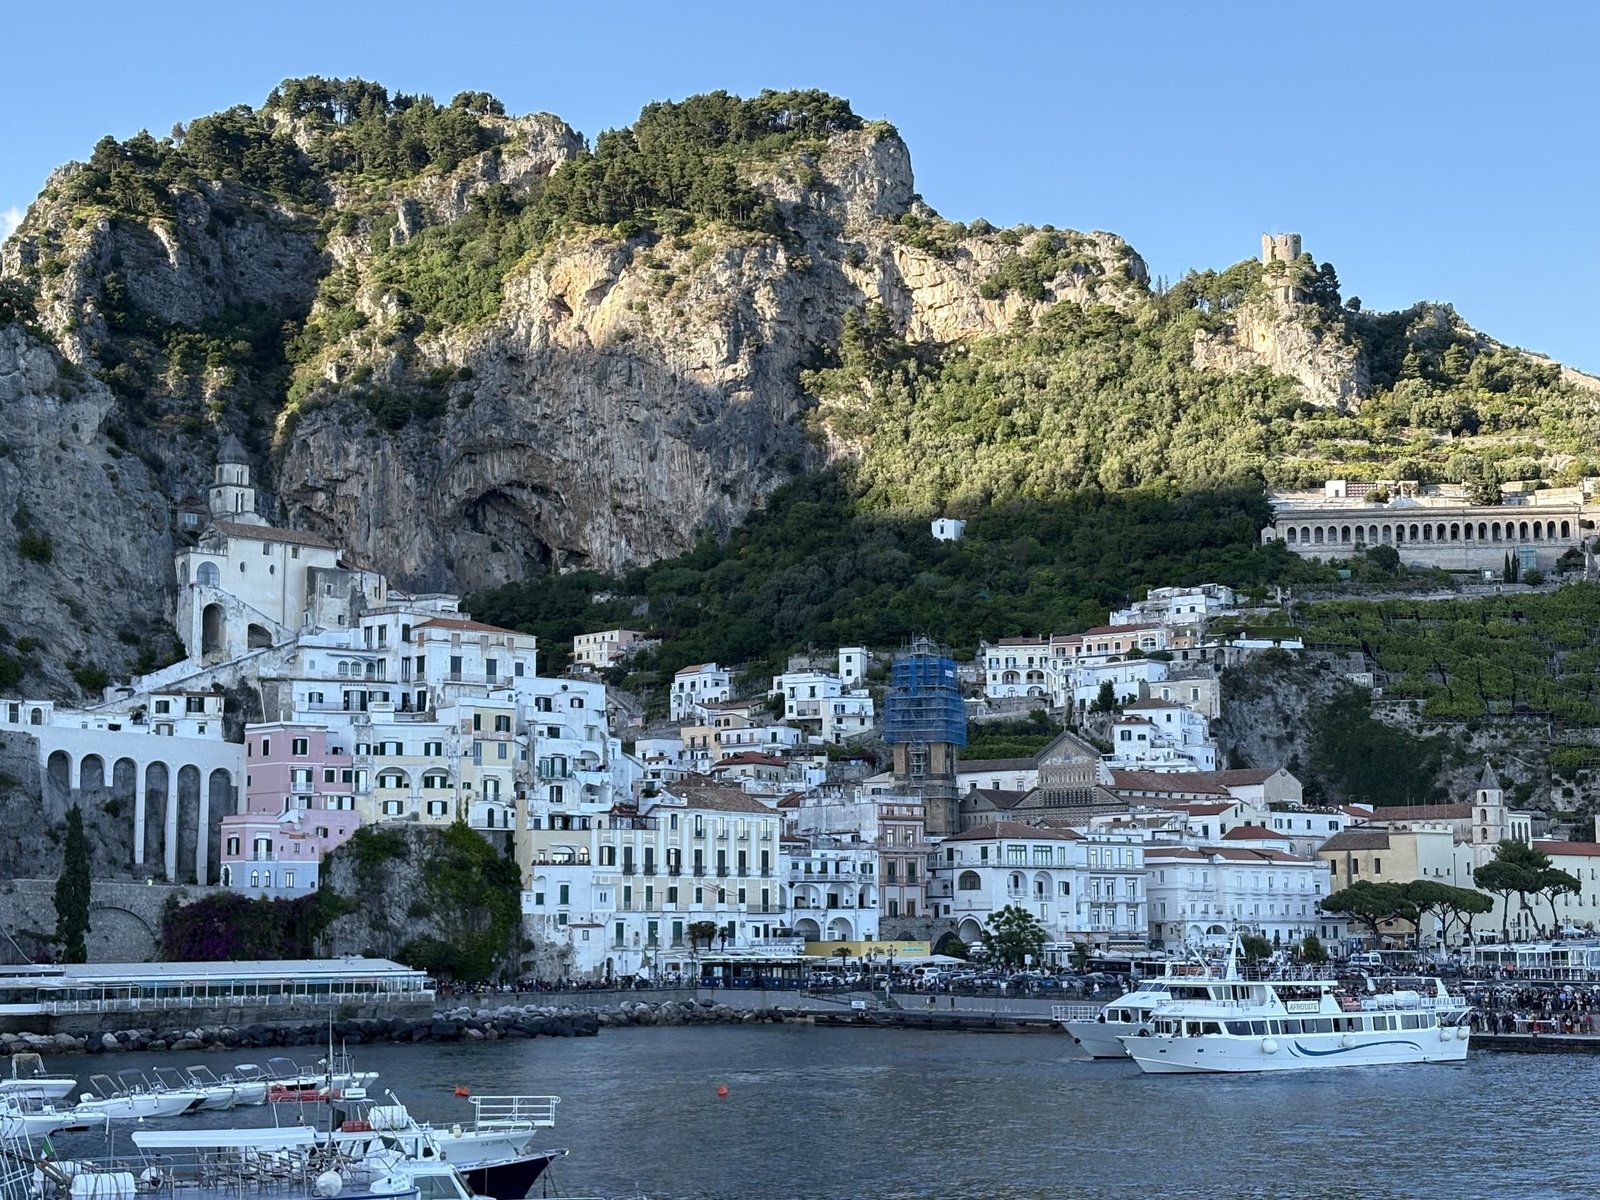
Amalfi Town was not the most glamorous base I considered, but for a short trip involving Capri, the Path of the Gods, ferries and light luggage, it made the logistics much easier. Here is why I chose it over Positano, Ravello, Sorrento and Atrani.
When I was planning a short stay on the Amalfi Coast, I kept coming back to one practical question: where should I sleep?
Positano had the postcard views. Ravello had the hilltop setting. Sorrento was easier to reach from Naples. But for the route I was taking — arriving from Capri, hiking the Path of the Gods, moving around by ferry and eventually returning to Naples — Amalfi Town made the most sense.
That decision turned out to be one of the easiest parts of the trip to validate in practice. Amalfi was busy and touristy, but it was also compact, well connected, easy to manage with luggage and far more convenient than some of the more photogenic alternatives.
The quick decision
Best for…
Travellers who want easy ferry access, straightforward Path of the Gods logistics, manageable luggage and a central base for exploring several parts of the coast.
Choose somewhere else if…
You care more about postcard glamour, quiet hilltop views or staying somewhere removed from the busiest tourist centre.
Amalfi worked especially well for this trip because…
The ferry port, buses, town centre and accommodation were all within an easily manageable area.
Why Amalfi Town worked for this trip
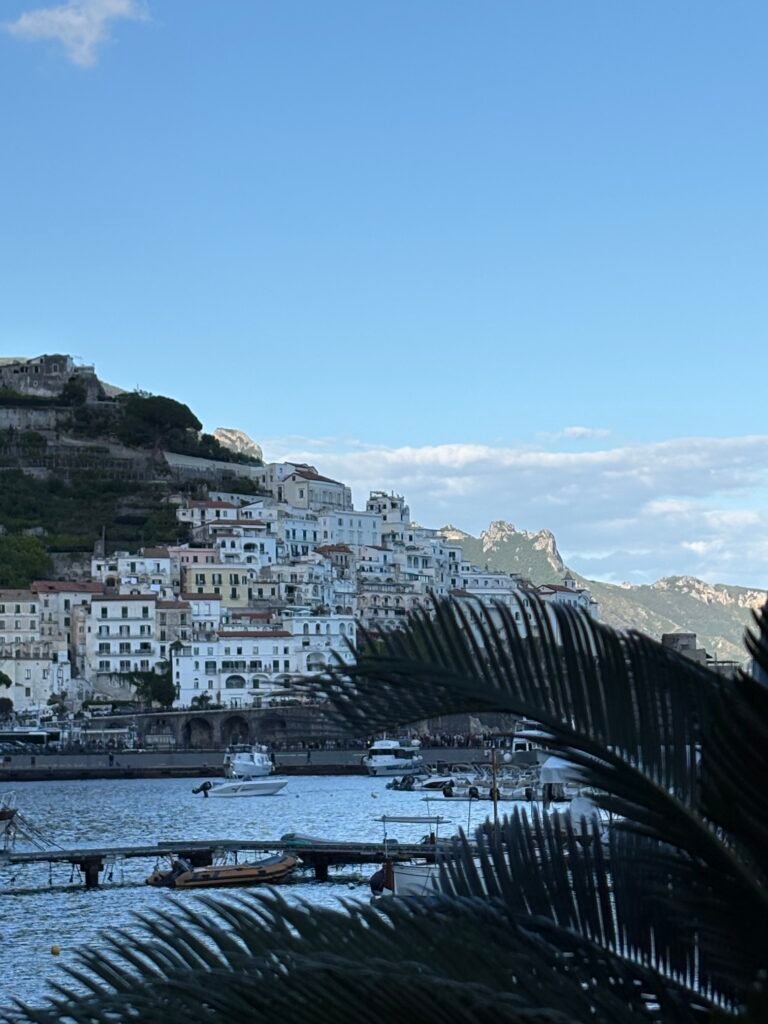
The biggest factor was ferry access.
I was arriving from Capri and wanted a base that gave me multiple options for moving around the coast and getting back toward Naples. Amalfi is a major ferry stop, with several operators and departures linking it to other coastal towns. If I changed my mind about how to spend a day, it was easy to imagine hopping on a ferry rather than building the whole trip around buses or taxis.
That flexibility mattered on such a short itinerary. It also worked particularly well for the Path of the Gods because the bus toward Bomerano left from the centre of Amalfi, close to the port, so I did not have to add another transfer before even reaching the trailhead.
For a trip that already involved moving between several places, I wanted the base itself to remove friction rather than add more. That was also part of the broader reasoning in How I Planned Four Nights Across Capri, the Amalfi Coast and Naples.
Why Amalfi beat Positano for me
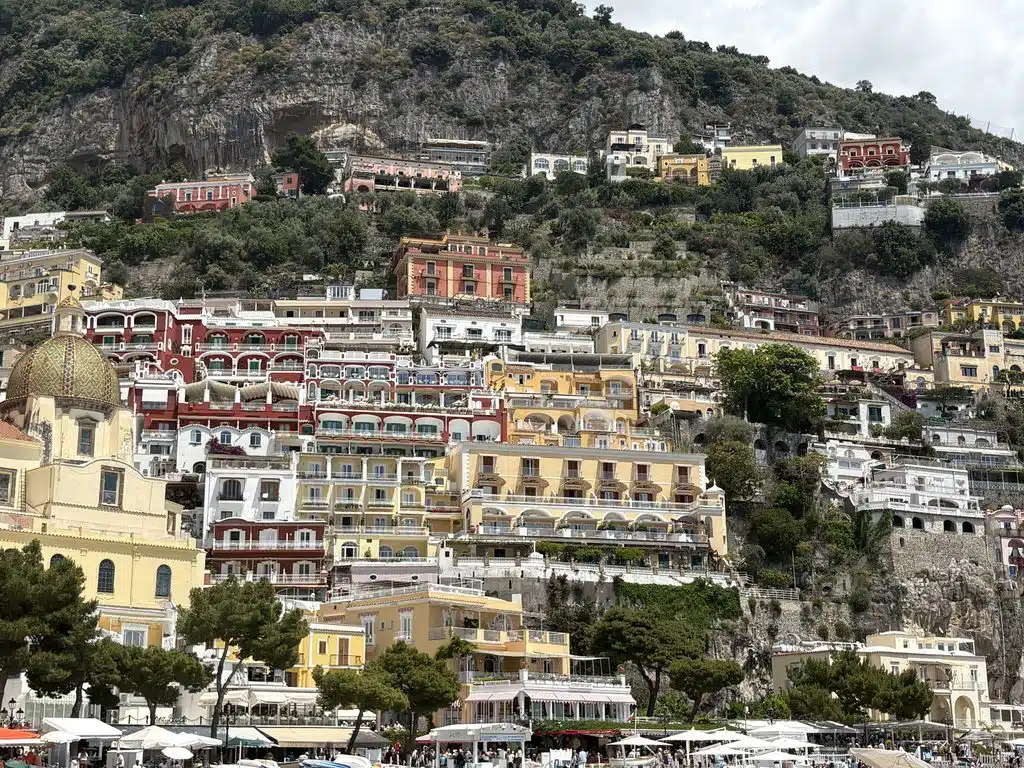
Positano was the obvious alternative, but I was worried about two things before I arrived: stairs and crowds. Both concerns turned out to be justified.
Positano is spectacular to look at, but it is built vertically. With luggage, that can mean stairs, steep streets, taxis or porter services depending on where you are staying. For a solo traveller moving with a roller suitcase and daypack, Amalfi was much easier.
When I reached Positano after hiking the Path of the Gods, the narrow streets were also extremely busy. It was beautiful, but I was glad I was not trying to drag luggage through the crowds or use it as the practical hub for the rest of my trip. Amalfi was busy too, especially during the day, but the basic logistics were easier and much more central to the route I had planned.
Why I ruled out Ravello
Ravello appealed to me for almost the opposite reason: it looked quieter, more elevated and removed from the busiest coastal traffic.
The problem was that it was also removed from the ferry network. Because Ravello sits up in the hills, staying there would have added another layer of bus or taxi logistics every time I wanted to move along the coast.
For a slower stay where I planned to spend more time in one place, that could be a reasonable trade-off. For this trip, it felt like unnecessary friction.
Ravello is high on my list for a future visit, but I am more likely to give it day-trip status than use it as a base if I still want easy access to the rest of the coast.
Why not Sorrento?
Sorrento was easier for me to eliminate.
It is well connected to Naples and can be a very practical base for the wider region, but it sits outside the stretch of coast I most wanted to experience. Staying there would have meant joining the day-trippers travelling toward Amalfi rather than actually being there in the evenings once many of those visitors had left.
It also felt larger and less aligned with the kind of stay I wanted. For a trip focused on Pompeii, Naples, Capri and the Amalfi Coast together, Sorrento could make a lot of sense. For my route, it would have put me one step farther away from the places I had prioritized.
Atrani was a nice surprise, but I would still choose Amalfi
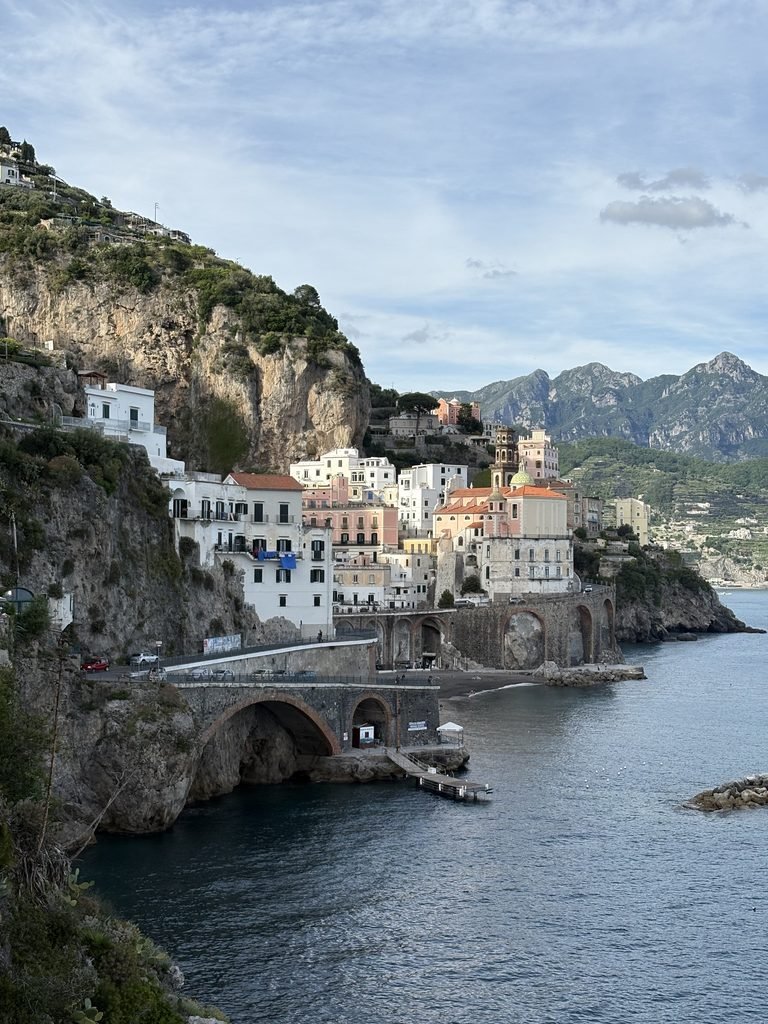
I did not seriously consider Atrani as a base before the trip, even though it sits directly beside Amalfi.
Once I was there, I understood the appeal. Atrani felt much quieter and less commercial, and being able to walk there from Amalfi was a bonus I had not fully appreciated during planning.
I would still choose Amalfi for this particular trip. Atrani has fewer restaurants and services, and it does not have Amalfi’s ferry connections. Arriving with luggage would mean either walking everything over from Amalfi or arranging a taxi, which removes some of the convenience that made Amalfi work so well.
The better discovery was that staying in Amalfi gave me easy access to both: a lively transport hub when I needed it and a quieter neighbouring town within walking distance.
How the bases compared for this trip
None of these towns is inherently the “best” base. The question is which trade-off matches the trip you are actually taking.
| Base | Strongest reason to choose it | Main trade-offs for this trip |
|---|---|---|
| Amalfi | Ferries, buses, Path of the Gods logistics and manageable luggage | Busy and touristy |
| Positano | Dramatic setting | Stairs, crowds and more difficult luggage logistics |
| Ravello | Quiet hilltop atmosphere | Another transfer whenever you want to reach the coast |
| Sorrento | Excellent Naples and regional connections | Farther from the stretch of coast this trip prioritized |
| Atrani | Quieter atmosphere immediately beside Amalfi | Fewer services and no equivalent ferry hub |
Why Amalfi worked so well in practice
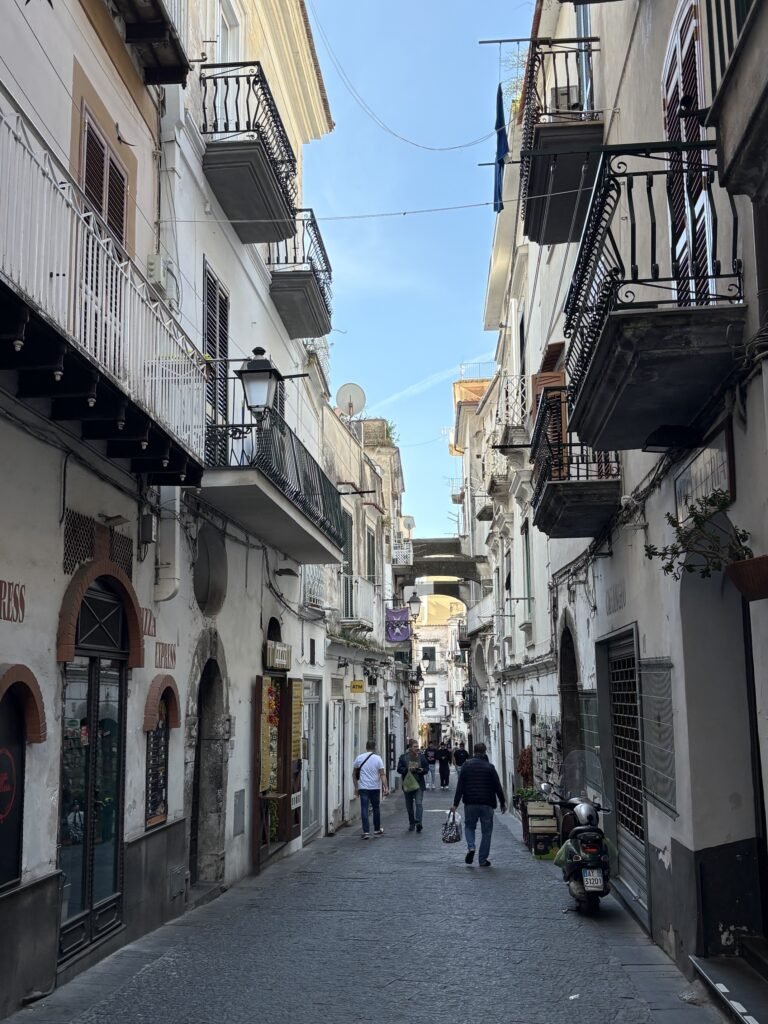
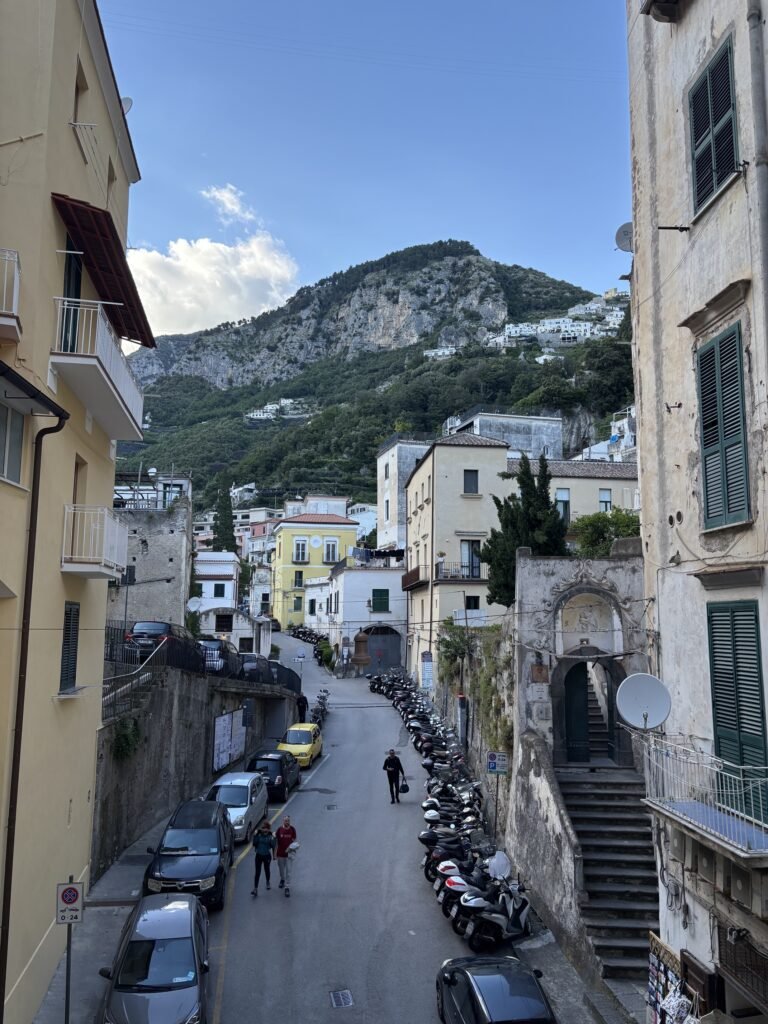
The town itself was even more compact than I expected.
The ferry and bus areas sit directly beside the centre, and the main square begins almost immediately behind them. The Duomo dominates the square, restaurants are everywhere, and the main pedestrian street runs gradually uphill through shops, cafés and food stands.
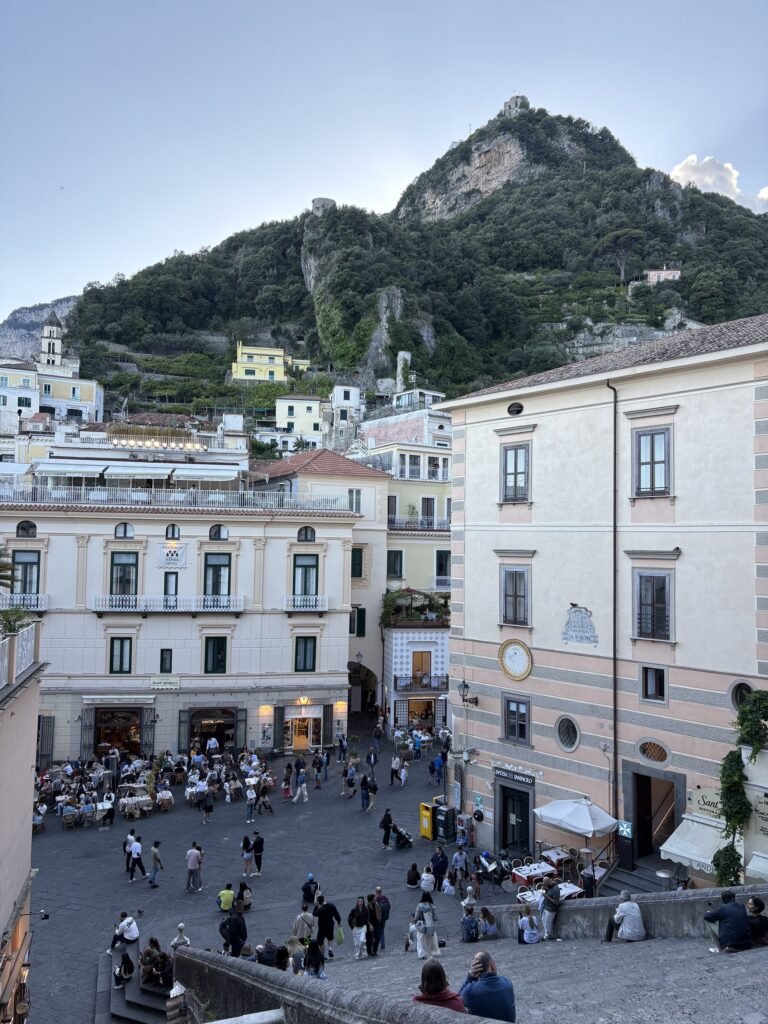
It was very difficult to get lost in the central part of town, and that simplicity mattered with luggage. My Airbnb was on the main road a little beyond the busiest tourist area, so I could roll my suitcase uphill without dealing with major stairs while still staying within an easy walk of the port, bus stops, restaurants and sights.
The location also made the Path of the Gods logistics much easier, something I cover in detail in How to Hike the Path of the Gods from Amalfi: Bus, Trail and Return Logistics.
Why Amalfi won this trade-off
- direct arrival from Capri;
- ferry options along the coast;
- bus access towards Bomerano;
- manageable with a roller suitcase;
- restaurants and services close at hand;
- Atrani within walking distance;
- comparatively good accommodation value.
The accommodation was good value
Price was not the only reason I chose Amalfi, but it definitely helped.
I paid C$453.54 for two nights in a full Airbnb apartment on the main road, just beyond the busiest part of town. It was a lot cheaper than most of the other accommodation options I saw on the Amalfi Coast and gave me more space than I needed as a solo traveller.
That value reinforced the decision, but the transport and hiking logistics had already been pointing me toward Amalfi before I found the apartment.
What I liked less about Amalfi
Amalfi is not a hidden gem.
During the day, it was extremely busy. The main street could become packed enough that getting anywhere quickly was unrealistic, and prices reflected the fact that it is one of the most visited places on the coast. The famous Amalfi lemon gelato I tried cost €20.
If your goal is to stay somewhere that feels removed from tourism, Amalfi is probably not the answer.
But it was still beautiful, and once I moved away from the busiest stretches, the experience changed. The alleys behind the main street were quieter, evenings felt calmer, and walking toward Atrani made it easy to escape the centre without changing bases.
It also worked well as a destination in its own right rather than just a transport hub. The Duomo, the waterfront, the restaurants and the compact layout made it easy to enjoy between excursions.
Would I stay in Amalfi again?
For another short trip focused on moving around the coast, yes.
It was central, well connected and easy to manage with luggage, and almost every practical reason I had for choosing it proved correct once I arrived. On a longer return trip, I might split my stay and try one of the smaller towns such as Maiori or Minori, especially if travelling with family and looking for more space, while keeping Ravello high on the list for a day trip.
Amalfi Town may not be the most dramatic answer to “where should I stay on the Amalfi Coast?”, but for the trip I was actually taking, it was the right one: practical without feeling purely functional, beautiful without requiring me to sacrifice the logistics that mattered most.
More from this trip
- How I Planned Four Nights Across Capri, the Amalfi Coast and Naples
- How to Hike the Path of the Gods from Amalfi: Bus, Trail and Return Logistics
- Italy by Train and Ferry: Strikes, Connections and How Much Buffer to Leave
- Is Staying Overnight in Capri Worth It?
Plan your own trip
Know How You Travel
Understand how pace, comfort and the number of hotel changes fit the way you travel.
Plan Your Trip
Build a route around the time, priorities and logistics that actually matter.
Explore more of Italy
Planning more of Italy? Explore our firsthand articles and practical advice from Rome, Capri, the Amalfi Coast and Naples.
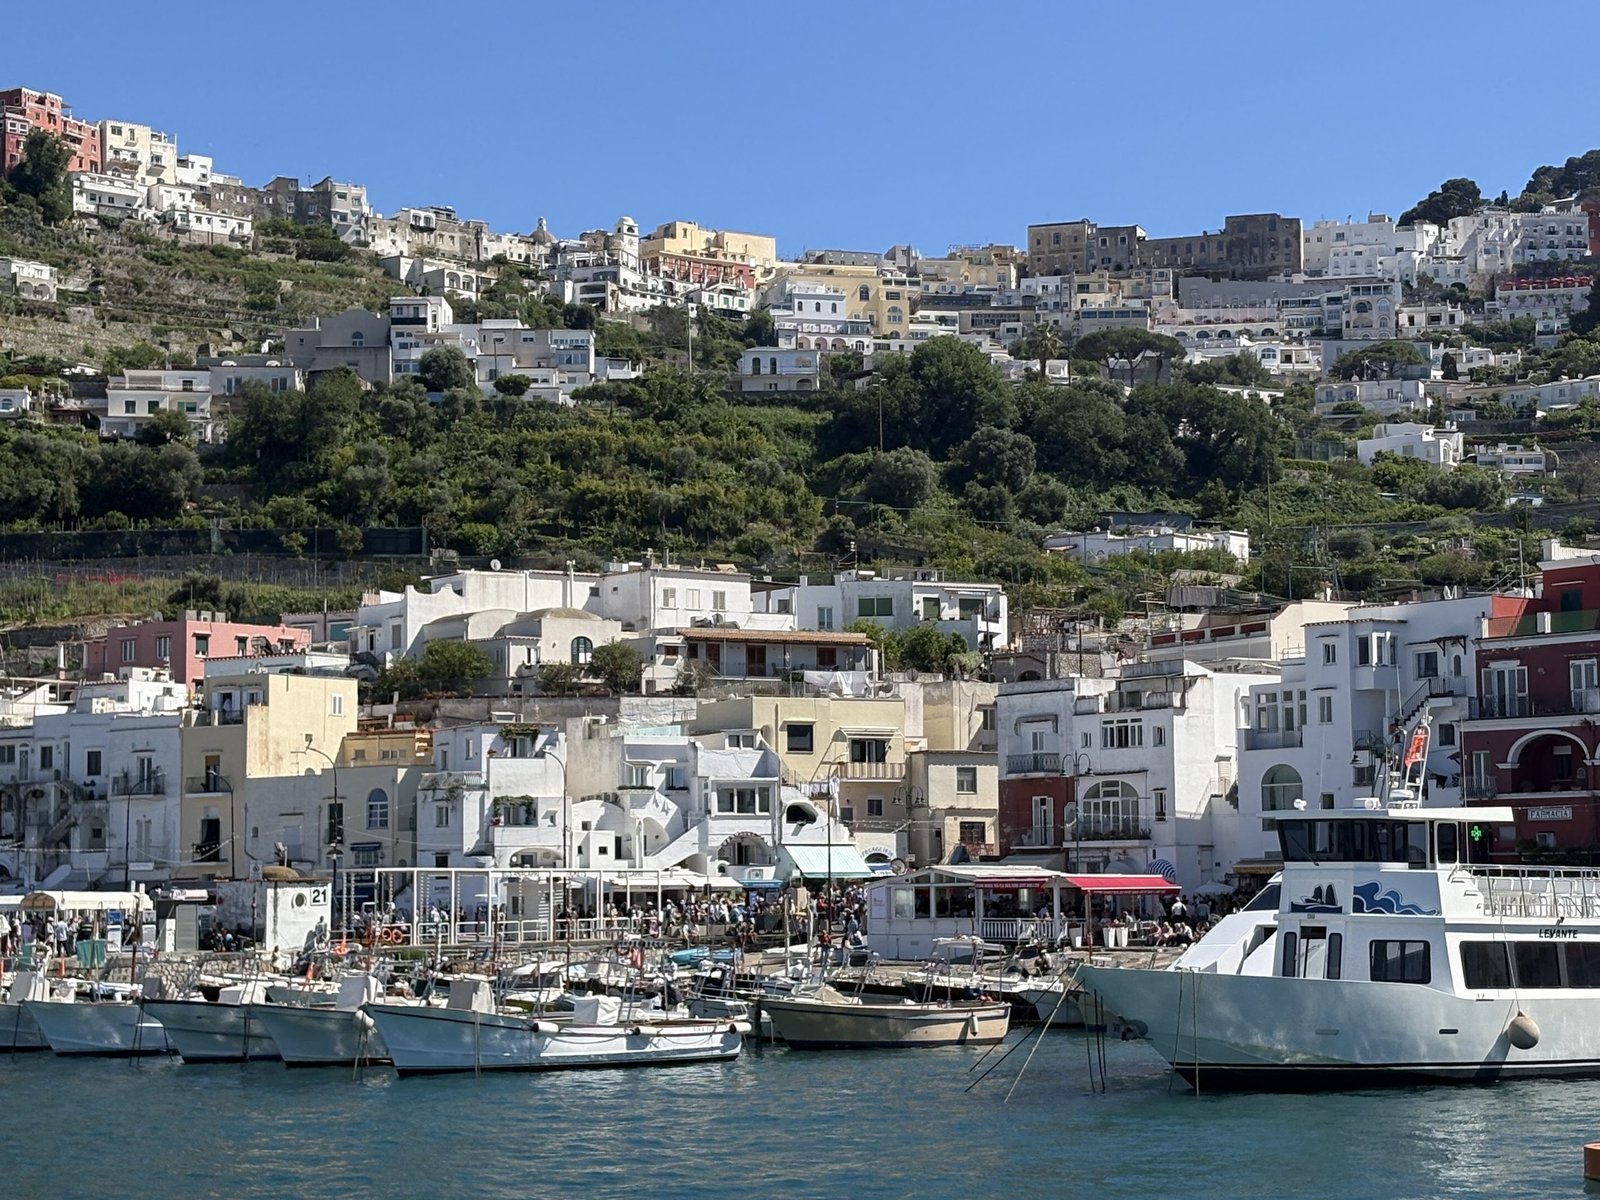
Travelling Italy by train and ferry was mostly straightforward; the uncertainty came from strikes, transfer time, rough seas and changing ferry operations. Here is how much buffer I would leave and what I would check before travelling.
Italy by Train and Ferry: Strikes, Connections and How Much Buffer to Leave
Travelling around Italy by train and ferry can look very simple when you build the route online. A high-speed train gets you into Naples, the metro connects to the port, and ferries link Capri and the Amalfi Coast.
In practice, the individual pieces were easy. The uncertainty came from what happened between them: a rail strike that remained unresolved until I was already in Italy, a rough ferry crossing that ran late, a cancelled port stop, and the fact that ferry schedules depend on conditions in a way train timetables do not.
On a four-night trip from Rome through Capri, Amalfi and Naples, I used Italo, the Naples metro and three ferry journeys. Everything ultimately worked, but the experience changed how I think about building transport connections in Italy. The main lesson was not to plan for perfection. It was to book the important pieces, check the most reliable sources, understand what could go wrong and leave enough room that one disruption does not derail the whole day.
The route I travelled
My transport sequence was:
EXPERIENCED IN MAY 2026
Train: Rome → Napoli Centrale — Italo
Metro: Napoli Centrale → Municipio
Walk: Municipio → Molo Beverello
Ferry: Naples → Capri — NLG
Ferry: Capri → Amalfi — NLG
Ferry: Amalfi → Naples — Positano Jet
I travelled with a small roller suitcase and a daypack, which made the transfers much easier. Larger luggage would not make this route impossible, but it would add friction every time you switch between train, metro, walking and ferry.
The sequencing itself was deliberate. I explain the broader reasoning in How I Planned Four Nights Across Capri, the Amalfi Coast and Naples, but one important consideration was getting off Capri and back onto the mainland well before my flight home.
Booking the Rome-to-Naples train
I travelled from Rome to Naples on Italo and booked directly with the company on March 21 for a May trip. My Prima Business ticket cost €38.90 for a scheduled 9:41 a.m. departure from Rome and 10:53 a.m. arrival at Napoli Centrale.
Booking early gave me a reasonable fare and allowed me to travel in business class. At the time, there was no indication that my travel date would become complicated. Then, while researching the trip, I started seeing posts about a national transport strike planned for May 16.
That was when a straightforward train booking became something I had to keep monitoring.
Check the official Italian strike database
For transport strikes in Italy, the source I would bookmark is the official Italian Ministry of Infrastructure and Transport strike database:
Check current Italian transport strikes
The database lists scheduled strikes by date and transport sector and proved much more useful than relying on forum discussions or summaries generated from older information.
Check before you travel
Strike status, guaranteed train lists, ferry schedules and departure points can change. This trip was taken in May 2026; verify current information with the relevant official operator or government source.
In my case, the strike was still a live possibility when I was already in Italy. I was coming up with contingencies almost until the last moment because the guaranteed-train information would only become useful very close to the travel date.
Rather than immediately cancelling or rebooking, I looked at my exact Italo train number and found an older guaranteed-service list from a previous strike. My train had appeared on that list before, partly because its journey originated farther north and began during an earlier protected period. That did not guarantee it would run this time, but it gave me enough reason not to panic and start dismantling an itinerary in which I had very little flexibility anyway.
The strike was eventually called off while I was in Italy and moved to another date. I was very glad I had waited. Travellers who had completely rearranged their plans in response to the original strike risked finding themselves dealing with the rescheduled disruption instead.
It was a useful challenge to my planner instinct: sometimes the better planning decision is to wait for reliable information rather than solving a problem that has not actually happened yet.
Planner lesson
Once you know which official source to monitor, more speculation does not necessarily create better information.
For anyone prone to travel anxiety, I would also be selective about how much forum reading you do once you already know a potential strike exists. Repeated speculative posts — and AI-generated answers relying on information that may no longer be current — can create far more stress than useful information. Once I knew what to monitor, the official source mattered more than another twenty opinions about what might happen.
A strike notice does not automatically tell you whether your train will run
Italian rail operators may publish lists of specific guaranteed trains that operate during a strike. Those lists generally identify services by train number, origin and destination, which means the train number matters more than simply looking at the portion of the route you are travelling.
If you are boarding in Rome, for example, your train may actually have started somewhere much farther north. Looking only for information about “Rome to Naples” could therefore miss something relevant to the full service.
My previous guaranteed-list research gave me some reassurance, but I would never treat an old list as proof that a train will run during a future strike. It was simply one useful clue while I waited for the current information.
Getting from Napoli Centrale to Molo Beverello
Once I reached Napoli Centrale, the transfer to the port was straightforward. I followed the M signs for the metro and travelled to Municipio, which took about five minutes and cost €1.50. I tapped my Wise card directly to enter, one of several everyday uses I cover in Using Wise for Travel: How It Works and How I Actually Use It.
From Municipio, I followed signs toward the port and used Google Maps as a second check. The walk to Molo Beverello took roughly ten minutes, was flat and was easy with a roller suitcase.
One useful visual clue is what not to follow: the giant cruise ships. I walked past that area toward the ferry terminal shown around Naples Beverello/Molo Beverello on Google Maps. Always check the departure point listed on your own ticket, because Naples has multiple port areas.
What Molo Beverello was actually like
Inside the terminal were ticket counters, bathrooms, a small café, benches and electronic departure signs. The boarding process itself was a little less polished.
Passengers were gathering near the doors and forming lines as ferry departures approached. An attendant checked my e-ticket and luggage and handed me a small paper boarding slip. My booked ferry was the 11:55 a.m. departure, but the paper I was handed showed 11:35. A couple of other passengers had papers with the same time, while most appeared to have 11:55 slips.
I briefly considered leaving the line to ask for a replacement, but passengers were already gathering for the 11:55 ferry and I could not see a separate 11:35 boarding process underway. I also still had my original e-ticket on my phone if I needed to prove what I had booked, so I stayed where I was.
That was the right decision. The crew collected the small paper slip when I boarded, and that was what actually got me onto the boat. In this case, my e-ticket mattered because it was what I had shown to obtain that boarding slip.
Why I would leave about an hour between train and ferry
My Italo train was scheduled to arrive at 10:53 a.m. and my NLG ferry to Capri departed at 11:55 a.m., giving me just over an hour.
For this particular connection, that felt right. There had been an earlier ferry at about 11:35 a.m., and before travelling I had wondered whether I could make it. Once I actually arrived, took the metro, walked to the port, used the bathroom and figured out the boarding process, I remember thinking very clearly that I would not have made the earlier departure comfortably. By the time I reached Molo Beverello, passengers were already gathering for my 11:55 ferry.
I would not recommend trying to move faster simply because the timetable technically makes a tighter connection possible. The purpose of a buffer is to absorb the normal friction of travel, not to prove that a transfer can be done at maximum speed.
My starting point
Napoli Centrale → Molo Beverello → ferry
About 1 hour minimum between scheduled train arrival and ferry departure.
Add more time if:
- the ferry is especially important;
- you have larger luggage;
- you are travelling with children or anyone who needs more transfer time;
- disruption is already likely;
- missing the ferry would have major consequences.
For Napoli Centrale to Molo Beverello, I would personally use about an hour as a reasonable starting point and add more if the ferry were particularly important, if I had substantial luggage, or if I were travelling with people who needed more time to make the transfer.
Ferries introduce a different kind of uncertainty
My Naples-to-Capri ferry was scheduled to take about an hour, but the sea conditions were extremely rough.
As we boarded, staff were handing passengers seasickness bags and actively encouraging everyone to take one. At first I assumed this was standard procedure. It quickly became obvious that it was not.
A large number of passengers became sick during the crossing — possibly close to half the boat — and staff spent much of the journey helping people and trying to keep everyone updated. A few passengers had to be taken outside, and the crossing took longer than scheduled because of the waves.
If the crew is proactively handing out seasickness bags and telling you to take one, I would take it.
I was fortunate not to get sick. I sat by a window and kept my eyes on the horizon, something I knew from previous boating experience could help when the boat is moving unpredictably. I would also avoid staring at a phone or at the onboard screen showing the view from the front of the boat during a rough crossing.
This was very clearly the exception rather than my normal ferry experience. On my later Capri-to-Amalfi and Amalfi-to-Naples trips, I did not notice anyone becoming seasick, and both crossings felt dramatically calmer.
I had also intentionally left my first afternoon in Capri relatively open, so arriving later did not create another problem. That flexibility is one reason the overnight stay worked well for me, which I discuss more fully in Is Staying Overnight in Capri Worth It?
Think about how your luggage is stored
Luggage arrangements varied between the ferries I used. On the larger Naples-to-Capri boat, anything larger than a daypack was left toward the rear of the vessel rather than beside your seat, so I could not see my roller suitcase during the crossing.
Because of the rough conditions, the outside of my suitcase was wet with seawater when I collected it. Everything inside was fine, but it made me think differently about ferry packing. A hard-shell or more water-resistant suitcase could be useful, and anything particularly vulnerable to water should be protected inside your luggage.
On my later ferries, bags were stored inside toward the rear of the cabin, so do not assume every boat will handle luggage in exactly the same way.
Boarding in Capri worked differently
At the Capri port, electronic screens showed which numbered area passengers should use for each ferry. I arrived early enough to find the right section and watch the boarding process before my boat arrived.
This time, I did not need to exchange my electronic ticket for a paper boarding slip. Staff simply scanned the QR code on my phone. Other passengers had paper tickets they had apparently bought locally.
That reinforced a practical lesson from the trip: do not assume the process will be identical at every port. Give yourself enough time to check the screens, find the correct queue and ask if something is unclear.
Capri to Amalfi: your route can change after departure
My ferry from Capri to Amalfi was supposed to stop in Positano first. Passengers only learned after we were underway that the Positano stop had been cancelled.
Some travellers onboard had tickets specifically for Positano, and they were understandably upset. There did not appear to be an immediate replacement arranged onboard, and there was discussion about whether they would need to find another boat or continue by bus after reaching Amalfi.
When we eventually reached Amalfi, the captain’s decision made considerably more sense. Even in Amalfi’s more protected harbour, it took three or four attempts to dock because of the wind. Positano’s ferry landing is much more exposed.
The important planning lesson is that a ferry ticket cannot guarantee the exact route in the same way a timetable makes it appear. Weather can affect not only the journey time but whether a scheduled port stop is possible at all.
Amalfi to Naples: same-day booking worked for me
For my final ferry from Amalfi back to Naples, I had considered booking Positano Jet in advance. A woman at the Amalfi ticket booth advised me that buying it that morning should be fine, so I followed her advice and purchased the ticket shortly before departure.
It worked smoothly. The boarding area used signs and separate queues for different ferries, although it still felt somewhat chaotic when several boats were arriving and boarding at once. There were moments of wondering why another line was moving while mine was not, or whether the approaching ferry was the right one, but getting into the correct line a little early meant I could see the boats and hear what staff were saying.
That crossing back to Naples was much calmer than my first ferry. The luggage was stored inside, nobody around me appeared seasick, and I could close my eyes and listen to a podcast rather than concentrating on the horizon.
Ferry strikes are worth checking too
Rail was not the only possible strike I encountered. There was also a maritime strike listed around the time I was travelling on the Amalfi Coast, which was not especially reassuring after already dealing with the uncertainty around the train.
I contacted my hotel in Capri and asked whether they had any local information. Their response was essentially that ferry service would continue and that I should book with one of the major operators. I decided to trust that advice and keep the itinerary while continuing to monitor the official Ministry strike database.
Because that same database includes maritime transport, I would use it for both rail and ferry disruption checks. As with the train strike, dates and status can change while older forum discussions and search results continue circulating as though nothing has happened.
How much buffer would I leave?
I would not turn one trip into a universal rule, but the experience gave me a useful starting point.
For a high-speed train arriving at Napoli Centrale followed by a ferry from Molo Beverello, I would personally allow around an hour at minimum. For a ferry arriving in Naples followed by a train, I would use at least a similar margin and would be inclined to add more because ferry arrival times can be affected by weather.
A ferry followed by an international flight deserves more caution, but I would not prescribe a universal number of hours. The answer depends on the port, airport, season, weather and what alternatives exist if the boat is delayed or cancelled. The more useful question is: what happens if this ferry does not run?
Why Capri came first in my route
That question was one reason I deliberately put Capri near the beginning of my four-night route rather than immediately before my flight home.
If severe weather stopped ferries from leaving Capri, I could potentially be stuck on the island temporarily. By travelling Capri → Amalfi → Naples, I moved back onto the mainland well before my flight.
Once in Amalfi, a cancelled ferry would still have been inconvenient, but there were potential overland alternatives through places such as Salerno or Sorrento. That is very different from relying on a ferry off Capri as your only connection before an important international flight.
This sequencing was part of the broader logic behind the trip, which I explain in How I Planned Four Nights Across Capri, the Amalfi Coast and Naples.
Plan the route, then leave room for reality
The biggest lesson from these few days was not that Italian transport is unreliable. Most of my journeys ultimately worked close enough to plan.
What changed was my understanding of how much uncertainty can sit around a carefully researched itinerary. A strike can remain unresolved until almost the last moment. A ferry can run late because of waves. A captain can skip a port. An online discussion can keep telling you there is a crisis after the official situation has already changed.
My instinct as a planner is to solve problems early. In this case, staying calm and waiting for reliable information was the better decision. I am glad I did not start rebuilding the Rome-to-Naples connection around a strike that was eventually called off and moved, and I am equally glad I did not try to squeeze myself onto the earlier Capri ferry simply because the timetable suggested it might be possible.
For future train-and-ferry travel in Italy, I would use the same approach: research the route carefully, check official disruption sources, leave realistic margins and understand what the backup options are.
Then stop trying to control every possibility and let the trip happen.
More from this trip
- How I Planned Four Nights Across Capri, the Amalfi Coast and Naples
- Is Staying Overnight in Capri Worth It?
- How to Hike the Path of the Gods from Amalfi
- Why I Chose Amalfi Town as My Base
Plan your own trip
Know How You Travel
Understand how pace, comfort and the number of hotel changes fit the way you travel.
Plan Your Trip
Build a route around the time, priorities and logistics that actually matter.
Explore more of Italy
Planning more of Italy? Explore our firsthand articles and practical advice from Rome, Capri, the Amalfi Coast and Naples.

Wise has become one part of how I manage money while travelling: useful for many foreign-currency purchases and cash withdrawals, but not a replacement for credit cards or cash. Here is how I actually use it and where the trade-offs are.
I signed up for Wise because I was tired of losing money every time I needed another currency. Exchanging cash before a trip rarely gave me anything close to the exchange rate I could see online, while using a regular Canadian credit card abroad added another layer of foreign-currency costs. I also did not want to travel with large amounts of cash simply because I needed access to local currency.
That became much more important when we started planning several months through Southeast Asia and Japan. Carrying enough cash for a trip that long was never going to be sensible, so I wanted a way to access money as we travelled rather than trying to predict our cash needs months in advance.
I found Wise while researching options used by other travellers and decided to test it before relying on it for a long trip. I used it first in Mexico, put it through a much more serious test in Italy, and have since used it from Canada to pay for flights, ferries and hotels in Thai baht.
So far, it has become my preferred way to handle many foreign-currency purchases when I do not need the rewards or insurance benefits of a regular credit card. I still travel with credit cards and still use cash where necessary; Wise simply gives me another, often cheaper, way to pay.
Affiliate disclosure: This article contains affiliate links. If you book or buy through one of them, I may earn a commission at no additional cost to you. This does not affect the recommendations or comparisons in the article.
See the current Wise account and card options.
What Wise actually does
Wise is a multi-currency account with a debit card attached. For Canadian customers, it currently allows you to hold and spend in more than 40 currencies. If you make a purchase in a currency you are not already holding, Wise can convert money automatically from another available balance.
Wise says it uses the mid-market exchange rate and charges a separate conversion fee rather than building an additional markup into the exchange rate. That was the distinction that interested me. I am not trying to time currency markets or optimize every fraction of a cent; I wanted a straightforward way to access foreign currencies without repeatedly accepting poor exchange rates.

I tested it before relying on it for a long trip
Mexico became my first experiment. The physical card had not arrived before departure — I remember delivery taking around 15 business days — but I could create a digital card immediately and add it to Apple Wallet.
I did not use it extensively because phone-based tap payments were not available everywhere I wanted to pay, but I successfully used it at the hotel for the tourist tax and again at the airport for snacks. It was enough to show that the basic system worked.
Italy became the real test. I used Wise for public transit in Rome and Naples, the Capri funicular, restaurants, attraction admissions and an ATM withdrawal. It worked everywhere I tried it, and I also deliberately topped up the account while abroad to make sure I could do that before relying on the same system for a much longer trip.
How I add money from Canada
I connect my Canadian bank account through the Wise app and initiate transfers from there. In my experience, the money has appeared in Wise almost immediately and I have sometimes used it for a booking within minutes, even though the withdrawal from my Canadian bank account appeared a couple of business days later.
That is my experience rather than a guaranteed processing time, so I always make sure the money remains in the linked account until the transfer actually clears.
More importantly, topping up from Italy worked just as it did at home. That means I do not need to load months of travel spending onto Wise before leaving Canada. I can keep most of our money in our regular bank account and move smaller amounts as needed.
The bank connection does occasionally need to be reauthenticated. That is easy enough at home but worth planning for abroad because your bank may require multi-factor authentication, including a text to your Canadian number. If you plan to travel using eSIMs, make sure you still have a way to complete your normal Canadian banking authentication.
I also avoid moving money over public hotel, café or airport Wi-Fi, just as I would avoid logging into my regular bank account on those networks.
Why I usually leave the balance in Canadian dollars
Wise allows you to hold multiple currencies, but I generally leave my balance in CAD and let Wise perform the conversion when I spend.
That means I do not have to predict exactly how many euros or baht I will need and then potentially pay to convert unused money again later. It is possible to watch exchange rates and convert when they look favourable, but that is more optimization than I personally want to do.
For me, part of the appeal is not having to think about currency constantly.
Using Wise at an ATM
My ATM withdrawal in Italy was one of the most useful tests.
The machine offered to convert the transaction into Canadian dollars for me. I declined and chose to withdraw in euros instead, allowing Wise to perform the currency conversion. Wise recommends the same approach: when an ATM, store or website offers a home-currency conversion, choose the local currency instead.
At the ATM
Choose the amount in the local currency, not Canadian dollars, so the ATM does not perform its own currency converstion.
When I checked the exchange rate afterward, it compared extremely favourably with the market rate. A colleague travelling at the same time had exchanged cash another way, and the difference between what we had effectively paid for our euros was striking.
Current Wise ATM fees for Canadians
ATM fees are something I would always verify before travelling because Wise can change its pricing. At the time of writing, Wise says Canadian customers can withdraw a combined C$100 per calendar month without a Wise ATM withdrawal fee. Above that amount, the current Wise fee is C$2.69 plus 2.69% of the amount over the allowance. The ATM operator can also charge its own separate fee.
Wise pricing can change
These were the Canadian ATM fees checked when this article was written. Verify current Canadian pricing with Wise before relying on these amounts.
That affects how I think about cash withdrawals. Once you are beyond the free allowance, repeatedly taking out small amounts is unlikely to be efficient because you may be paying Wise’s fixed fee as well as a local ATM fee each time. On a long trip, I will need to balance security — I still do not want to carry large amounts of cash — against avoiding unnecessary repeat withdrawal fees.
The best amount will depend on the country. In places where ATMs impose substantial local fees, making fewer, more deliberate withdrawals may make more sense than treating an ATM like one at home and taking out a small amount every few days.
Wise still does not replace cash
Even with Wise, I would not travel without some cash. On the Amalfi Coast, for example, I encountered local bus fares that needed to be paid in cash, and some small attractions and businesses either required cash or made it simpler.
The difference is that I no longer need to predict before departure exactly how much cash the entire trip will require. I can withdraw local currency when I need it and use Wise for the transactions where cards make sense.
Using Wise before I even reach Thailand
One of the more useful discoveries has been that Wise can help with trip costs before departure.
While planning Thailand, I have used it to pay Bundhaya directly for ferry tickets, Bangkok Airways for flights and Booking.com for hotel reservations when I could choose to be charged directly in Thai baht rather than accept a Canadian-dollar conversion.
That has made me pay much more attention to the currency shown at checkout. A Canadian-dollar price may look convenient, but if the merchant is doing the conversion itself, that does not necessarily make it the better rate.
My default now is to check whether I can pay in the merchant’s local currency and let Wise handle the conversion instead.
Wise versus my Aeroplan credit card
Wise has not replaced my regular credit card because the two solve different problems.
My Aeroplan credit card earns points and includes travel-related insurance benefits that can matter for major purchases. I still use it for international flights and for hotel bookings where there is no meaningful advantage to paying directly in local currency.
When I use Wise instead, I am potentially giving up Aeroplan points in exchange for avoiding the foreign-currency costs associated with the credit card. For a small restaurant bill, the difference may be minor. For flights, hotels and months of international spending, it can become much more meaningful.
I am not currently trying to maximize every possible Aeroplan point, so I am comfortable making that trade-off more often. Someone trying to earn status or maximize credit-card rewards could reasonably reach a different conclusion.
Why I still carry backup cards
I would not rely on one card for a long international trip, even though Wise has worked reliably for me so far.
My husband now has his own Wise card, and we will carry regular credit cards as well. Within my own Wise account, I also have a digital card and a physical card available through Apple Wallet. The physical card remains important for ATM withdrawals, while the digital card provides another set of card details that can be useful if another card has to be frozen.
The goal is redundancy rather than finding one perfect payment method.
Wise
Best for: Many everyday foreign-currency purchases and some cash withdrawals.
Main advantage: Currency conversion is transparent and I can pay directly in local currency.
Trade-off: Conversion and ATM fees still exist, and I may give up credit-card rewards or protections.
Regular credit card
Best for: Purchases where rewards, insurance or purchase protections matter more.
Main advantage: Points, insurance and other card benefits.
Trade-off: Foreign-currency costs may make some international purchases more expensive.
Cash
Best for: Places where cards are not accepted or are impractical.
Main advantage: Still necessary in some situations.
Trade-off: It has to be obtained, carried securely and replenished as needed.
What I like — and what I would prepare for
The Wise app is straightforward, transaction notifications arrive quickly and adding money has been simple in my experience. I also appreciated getting access to a digital card before the physical card arrived.
The signup process itself takes more than a few minutes because Wise needs to verify your identity. I would do it on a phone, since you will need identification and photos as part of the process, and I would not wait until immediately before departure if you want the physical card.
The main inconvenience I have encountered is occasionally needing to reconnect my bank account. I understand the security rationale, but it reinforces the importance of maintaining access to whatever authentication your Canadian bank requires while travelling.
Wise also is not fee-free. Currency conversion carries a fee that varies depending on the currencies involved, and ATM fees can apply. What I prefer is being able to see those costs rather than having much of the expense hidden inside an exchange rate.
How I currently use them
Wise
Many foreign-currency purchases and access to local cash.
Credit card
Purchases where rewards, insurance or other protections are worth more to me.
Cash
Situations where cards are not accepted or are simply impractical.
Is Wise worth getting for travel?
For me, yes.
Even for a short trip, I like not having to exchange a large amount of cash in advance. I can pay directly in local currency, withdraw some cash after arriving and still keep a regular credit card available when its points or insurance benefits make it the better tool.
The case becomes much stronger for a long trip involving multiple currencies. For several months through Southeast Asia and Japan, I can keep most of our money in Canada, move funds into Wise as we need them, withdraw local cash and pay directly in local currencies without trying to predict the entire trip’s spending before departure.
That does not make Wise the only card we will carry. It makes it part of a broader system: Wise for many foreign-currency transactions, credit cards where their rewards or protections matter more, and cash where cards simply do not work.
After testing it in Mexico, using it much more extensively in Italy and already paying for Thailand bookings with it, that is a system I am comfortable taking on the road.
See the current Wise account and card options for your trip.
Plan your own trip
Know How You Travel
Understand how pace, comfort and the number of hotel changes fit the way you travel.
Plan Your Trip
Build a route around the time, priorities and logistics that actually matter.

THAILAND · PLANNING & RESEARCH Twenty-six nights sounds like a lot of time in one country. In Thailand, it still was not enough to do everything we considered. That was never really the goal. Thailand is the first stop on a much longer trip through Southeast Asia and Japan, and we wanted the beginning to…
How We Planned 26 Nights in Thailand Without Trying to See Everything
Twenty-six nights sounds like a lot of time in one country. In Thailand, it still was not enough to do everything we considered. That was never really the goal.
Thailand is the first stop on a much longer trip through Southeast Asia and Japan, and we wanted the beginning to do several things at once: help us recover from the flight from Canada, ease into travelling full-time as a family, experience some of northern Thailand, and still leave enough time for the islands and a slower pace.
The route we eventually settled on was:

It is not the fastest route, the cheapest route or the route that sees the most places. It is the one that best matched what we wanted from this part of the trip.
Affiliate disclosure: This article contains affiliate links. If you book or buy through one of them, I may earn a commission at no additional cost to you. This does not affect the recommendations or comparisons in the article.
The quick decision
This is a planning article about one specific 26-night Thailand route. It is not meant to be a universal recommendation for how long you should spend in the country.
Best for…
Travellers who want a mix of culture, nature and islands without changing locations every couple of days.
Add more mainland time if…
National parks, historic sites and overland exploration matter more to you than long island stays.
Move faster if…
Frequent hotel changes energize you and seeing more places matters more than building in downtime.
Choose a different route if…
You are trying to minimize costs and prefer long buses, trains or ferries to paying more for domestic flights and shorter transfers.
Why Thailand became our first stop
Our original Southeast Asia route ran in almost the opposite direction. We initially thought we would fly into Singapore, travel north through Malaysia and southern Thailand, continue through Bangkok and northern Thailand, and then move toward Laos. Geographically, it looked tidy.
Then we started looking more closely at January weather. Singapore tends to be wetter in January than later in the winter, while January is a strong time for much of Thailand. That pushed us to reconsider the sequence entirely. Once we decided to reverse the route, the flight research changed too: instead of looking for ways into Singapore, we began looking at Bangkok.
Fortunately, Bangkok is a major Southeast Asian hub, so starting there did not create a problem. It did, however, mean rebuilding the Thailand route because our neat south-to-north progression no longer made much sense.
There were also some advantages to putting Thailand first. We wanted both the north and the islands, January allowed us to reach northern Thailand before the worst of the burning season, and beginning with a substantial amount of time in one country felt like a gentler way to start a very long family trip.
After a busy fall and holiday season at home, we also expect to need some actual rest. The islands became part of that plan rather than something tacked onto the end.
How we decided how many nights to give each place
There was no formula that said Bangkok gets four nights and Koh Lanta gets six, but there were a few principles we kept returning to.
PLANNING & RESEARCH
This route reflects our plans before travelling. We will update the site with firsthand experience once we have started our trip.
Arrival and departure days are not really full days. Packing, checking out, getting to an airport or ferry, transferring to the next place and settling in again all consume time and energy. Arrival days can still be good for walking around and getting oriented, but we do not count on them for major activities.
We also wanted to balance quicker stops with slower ones. We did not want the whole trip to feel like a cycle of packing, moving, unpacking and starting again.
The other rule I keep trying to use is roughly one substantial planned activity per day when travelling with the kids. If we do more, great. But if Doi Inthanon, an elephant sanctuary or a full-day boat trip is the main event, that is enough structure for the day. The rest can be a market, a walk, the hotel pool, homeschooling, an unplanned restaurant or simply doing less because everyone is tired.
It is the compromise between the planner part of me that wants to know where we are sleeping and how we are getting there, and the more flexible part of family travel that needs room to respond to how everyone is actually feeling.

Bangkok – 4 nights
LANDING ZONE
Bangkok is partly a destination and partly our landing zone.
Our flight arrives around 6:30 a.m. after a long journey from Canada, so four nights does not mean four energetic sightseeing days. Jet lag alone could determine how much we accomplish at the beginning.
We are interested in Bangkok for the food, temples, markets and city experience rather than nightlife. We also wanted enough time to keep the possibility of a day trip to Ayutthaya without making the rest of Bangkok feel compressed.
At one point, we considered travelling gradually north from Bangkok, potentially stopping around places such as Ayutthaya or Erawan Falls rather than flying onward. That would have given us more mainland Thailand and a more overland route, but it would also have meant more early hotel changes at exactly the point when we are adjusting to the time zone, language, culture and the reality of travelling together for several months.
Four nights gives us somewhere to land. If we are feeling energetic, we can do more. If jet lag hits hard, the itinerary can absorb it.

Chiang Rai – 3 nights
EASE INTO THE NORTH
Chiang Rai started as a one-night idea.
I already knew I did not want to visit it as a long day trip from Chiang Mai. That type of day could work for someone who wants to maximize sights and is comfortable spending hours in transit, but it did not fit the pace we were trying to establish with the kids.
Initially, the more obvious route was Bangkok → Chiang Mai, potentially using the overnight train as part of the experience. The problem came when I started working out how we would eventually get from northern Thailand to Koh Samui.
I was not interested in turning that transition into a 20-plus-hour overland journey. We would eventually need to fly south from Chiang Mai, and adding Chiang Rai as a quick side trip suddenly meant more backtracking and awkward flight timing.
Then I realized we could fly directly from Bangkok to Chiang Rai and continue overland to Chiang Mai afterward. That solved the route.
The third night came partly from accommodation research. The Riverie by Katathani kept standing out: a riverside resort close enough to Chiang Rai to explore the city, but with enough space and facilities that it could also function as somewhere to rest.
The temples are still the main reason Chiang Rai made the route. But three nights means we do not need to treat the city as a checklist. We can visit the temples, explore a little, let the kids enjoy the resort and simply recover if the first week of the trip has caught up with us.
Bangkok plus Chiang Rai gives us a full week to adjust before the pace picks up.

Chiang Mai – 4 nights
ACTIVITY BASE
The bus from Chiang Rai to Chiang Mai means our first day will already be partly consumed by moving. We also plan to leave Chiang Rai after a leisurely breakfast rather than treating the transfer as something that has to begin at dawn.
That leaves three full days in Chiang Mai, and we already have more than three things that interest us.
Doi Inthanon deserves its own day. So does an ethical elephant sanctuary if we find one that fits what we are looking for. I also want time to walk the Monk’s Trail, potentially continuing toward Doi Suthep depending on how everyone feels.
Then there is Chiang Mai itself: the old city, temples, markets, food and perhaps a massage.
Four nights is therefore not particularly generous. It simply gives us enough time to avoid stacking a major excursion every day. If Doi Inthanon takes one day and the elephant experience takes another, I still want at least one day where the plan can be something as simple as exploring the city and seeing where we end up.
Why we are flying south instead of travelling overland
This is one of the clearest places where our own travel priorities shaped the itinerary.
From Chiang Mai, we are flying directly to Koh Samui. That is not the cheapest way to travel between northern Thailand and the islands. It is the option that buys us the most time and removes the most friction.
Paying for time
Flying directly from Chiang Mai to Koh Samui costs more than travelling overland, but it preserves a large amount of travel time and removes a significant amount of friction. For this trip, that trade-off was worth paying for.
On our date, the direct Bangkok Airways flight is scheduled around midday, and direct options are limited. We booked it early because we specifically wanted to avoid routing back through Bangkok and because island flights during January can be popular.
The comparison was not simply flight price versus bus or train price. It was also a comfortable daytime transfer versus potentially losing an entire day — or more — getting four people across the country.
For someone who enjoys overnight trains and long overland travel, that journey could be part of the experience. For us, this time, it was not. We were willing to spend more to get directly to the island and preserve that day for the trip itself.

Koh Samui – 5 nights
EASY ISLAND TRANSITION
From the beginning, we wanted at least one island in the Gulf of Thailand and more than one island experience overall. Koh Samui won partly because it is easy to reach by air and partly because it seemed to offer more variety than a purely beach-focused stay.
The island of Koh Tao appealed less because so much of its reputation centres on diving, which is not an activity the kids can realistically take part in yet. Finally, Koh Phangan looked interesting, but Samui seemed to offer a broader mix for this particular trip: temples, markets, beaches, waterfalls, nature and easy access to Ang Thong Marine Park.
Five nights gives us enough time to do some of those things without feeling guilty about spending a day at the beach or pool.
I still have some reservations about Samui. It is more developed and often described as more expensive and touristy than other Thai islands, so I wonder whether it will feel less distinctive than I hope. That uncertainty is one reason I am glad it is not our only island.

Koh Lanta – 6 nights
SLOW DOWN
Koh Lanta is where we intentionally slow down, but that is not the only reason it made the route.
It seemed to offer a useful middle ground: quieter and less heavily visited than some of the better-known southern destinations, but still well connected enough that we would not have to give up access to the experiences that drew us to the region in the first place.
There appears to be enough to do without needing to schedule every day. Lanta Old Town, the national park, snorkelling and exploring the island itself all appeal to us. At the same time, if we decide that one of the classic excursions — perhaps the Four Islands or even Koh Phi Phi — is something we genuinely want to see, Koh Lanta still gives us access to those routes.
That balance was appealing. We did not want somewhere so remote that every excursion became a major logistical exercise, but we also did not want to choose a base simply because everyone else was already going there.
Six nights also gives us a deliberate rest period after Bangkok, Chiang Rai, Chiang Mai and Koh Samui. We can slow down, spend time at the beach, fit in homeschooling and decide how much exploring actually feels good once we arrive.
Geographically, Koh Lanta also helps the route keep moving south. From there, we can take the ferry directly to Koh Lipe rather than backtracking. Compare current Koh Lanta to Koh Lipe transport options on 12Go.

Koh Lipe – 4 nights
ISLAND FINALE
Koh Lipe takes more effort to reach, which was part of the debate about whether to include it.
The ferry from Koh Lanta is long enough that I am hoping everyone handles it well. A rough ferry crossing in Capri was a useful reminder that being comfortable around boats does not guarantee that hours on a rough passenger ferry will be pleasant.
What kept bringing me back to Koh Lipe was how simple the island experience sounded once we got there. It is compact and walkable, and the main plan is the beach, snorkelling, kayaking and resting rather than a list of organized tours.
It also created a very useful onward route. Instead of returning north to Krabi and flying toward Malaysia, we can continue by ferry from Koh Lipe directly to Langkawi. Langkawi was not originally a major part of the plan, but crossing into Malaysia this way lets the route continue naturally rather than backtracking.
We accepted some transfer friction in exchange for what we hope will be a quieter island stay and a more interesting transition into the next country. January also matters here: high season should mean better weather and more reliable ferry service than we would expect at other times of year.
Whether Koh Lipe actually feels quieter is something we will only know once we arrive.
Compare current Koh Lipe to Langkawi transport options on 12Go.
The hardest cut: Khao Sok
Khao Sok was probably the Thailand stop I found hardest to remove.
The photographs of Cheow Lan Lake immediately made it look like somewhere I wanted to go. At an early stage of planning, I assumed it would become one of the major stops between Koh Samui and Koh Lanta.
The more I researched it, the less straightforward the decision became. Adding Khao Sok meant another set of transfers. Many of the tours appeared to follow similar routes, which made me question whether the quiet lake experience I was imagining would actually feel quiet. Some activities also looked less suitable for our youngest child.
Doing it more independently did not necessarily solve the problem. Costs for transportation, tours and some of the lake accommodation added up quickly.
Eventually, we cut three or four nights that might have gone to Khao Sok and redistributed that time. That gave us six nights in Koh Lanta and made Koh Lipe possible.
Leaving something out is part of planning well
Khao Sok did not lose because it looked unworthy. It lost the trade-off against fewer transfers, longer island stays and a route that felt more manageable for this particular trip.
Khao Sok still looks spectacular. Cutting it does not mean I decided it was not worthwhile. It means it lost the trade-off this time. On another Thailand trip, it would be very high on the list.
What else we will miss
Thailand is a huge country, and 26 nights still means leaving out far more than we will see.
That is partly a time constraint, but it is also a consequence of how I plan. I am a planner, and I like knowing where we will sleep and how we will move between places, which means I am making many of these decisions months before arriving. I am relying on maps, schedules, blogs, forums, hotel reviews and other people’s experiences to decide which places deserve a limited number of nights.
That gives us structure, but it also has a cost. A completely open itinerary could let the trip lead us somewhere unexpected. We could hear about a town from someone we meet, decide to stay somewhere longer or find one of those places that never seems to make the “best of Thailand” lists.
By booking much of the framework ahead of time, we give up some of that freedom. The compromise I am hoping works is to leave room within the places we have chosen. We may know where we are sleeping, but we do not need to decide every activity before we arrive.
Maybe the best thing we do in Thailand will be something I have not researched yet. I would rather leave space for that possibility than keep adding destinations simply because they appear on somebody else’s list.
What we booked early — and what we left open
Once we settled the number of nights and had our arrival date, we could plug in the actual calendar and start looking at accommodation and transportation.
Accommodation came first. Once the stops and nights were fixed, the major transfers followed.
We booked early where a specific connection mattered to the shape of the route or where choices were limited. The direct Chiang Mai → Koh Samui flight is the clearest example: we wanted the direct option rather than returning through Bangkok, and January demand made waiting feel like an unnecessary risk. The same logic applied to other major island transfers where losing the convenient option would make the route considerably harder.
The exact list of outstanding bookings will change quickly as the trip gets closer, so it is less useful than the principle: lock in the pieces that determine whether the route works; leave the pieces that benefit from flexibility until later.
Activities are mostly still open. We know the experiences that helped us decide how many nights to allocate, but we do not need to choose the exact day or book every tour months in advance.
The accommodation and transportation provide the structure. The days themselves still have room to move.
Booked early
- accommodation once the route and nights were fixed
- major transport that determined whether the route worked
- the direct Chiang Mai → Koh Samui flight
- key island transfers where convenient options were limited
Left open
- most activities
- exact day-by-day schedules
- experiences where flexibility is useful
- decisions that are better made once we know how everyone is feeling
Who should not copy this route?
This itinerary would make little sense for someone trying to see the maximum number of places in 26 nights. A faster backpacker could cover much more, while someone who prefers settling into one place for a couple of weeks could reasonably decide that six stops is still far too many.
It is also not a particularly good template for someone minimizing costs. We are deliberately paying for domestic flights and easier transfers in several places where cheaper overland options exist.
Someone who loves overnight trains or long-distance buses could build a very different — and potentially more interesting — version of the same trip.
It is also not especially city-heavy. After Chiang Mai, the balance shifts strongly toward beaches, nature and downtime. If historic sites, national parks and mainland exploration are the main draw, those 15 island nights could be distributed very differently.
This route makes sense because of the mix we are trying to create, not because these are the six places everyone should visit.
What planning in advance cannot tell us
An itinerary can solve geography and logistics. It cannot tell us what the trip will actually feel like.
I cannot know in advance how hard the jet lag will hit us in Bangkok, whether January crowds will make the islands feel busier than expected, or how everyone will tolerate the pace once the novelty of the first few moves wears off.
I also cannot know whether we will wish we had spent more time on mainland Thailand and less time on the islands, or whether one of the places I carefully researched will simply not connect with us once we arrive.
There is a larger question underneath a trip this long too. Would we ultimately enjoy travelling more if we chose a base for two or three weeks at a time and took occasional side trips instead of continuing to move through multiple destinations? We would see less. We might experience some places more deeply.
For now, this route is the compromise between those two instincts: enough movement to experience very different parts of Thailand, but enough longer stays that we hope not to feel permanently in transit.
The route reflects the trip we want, not every possibility Thailand could offer
There are countless ways to spend 26 nights in Thailand, and our itinerary necessarily leaves out places we might have loved. That is not a flaw we can eliminate by researching harder. At some point, planning a trip means deciding which opportunities you are willing to give up.
The route we chose reflects a few priorities that kept winning when those decisions became difficult: start gently, mix culture with nature, give substantial activities their own day, pay for convenience when it saves a meaningful amount of time, and build slower stretches into a trip that will eventually last several months.
It also reflects the limitations of planning from afar. We have chosen where to sleep before knowing which unexpected places might have tempted us to stay.
That is how 26 nights became six stops. The real test will come in January, when the planning ends and we find out which assumptions were right — and which ones we would change next time.
Build a trip that fits you
Know How You Travel
Understand how pace, comfort and the number of hotel changes fit the way you travel.
Plan Your Trip
Build a route around the time, priorities and logistics that actually matter.
Explore more of Thailand
Planning a trip to Thailand? Explore our route planning, research and firsthand advice as the trip develops.
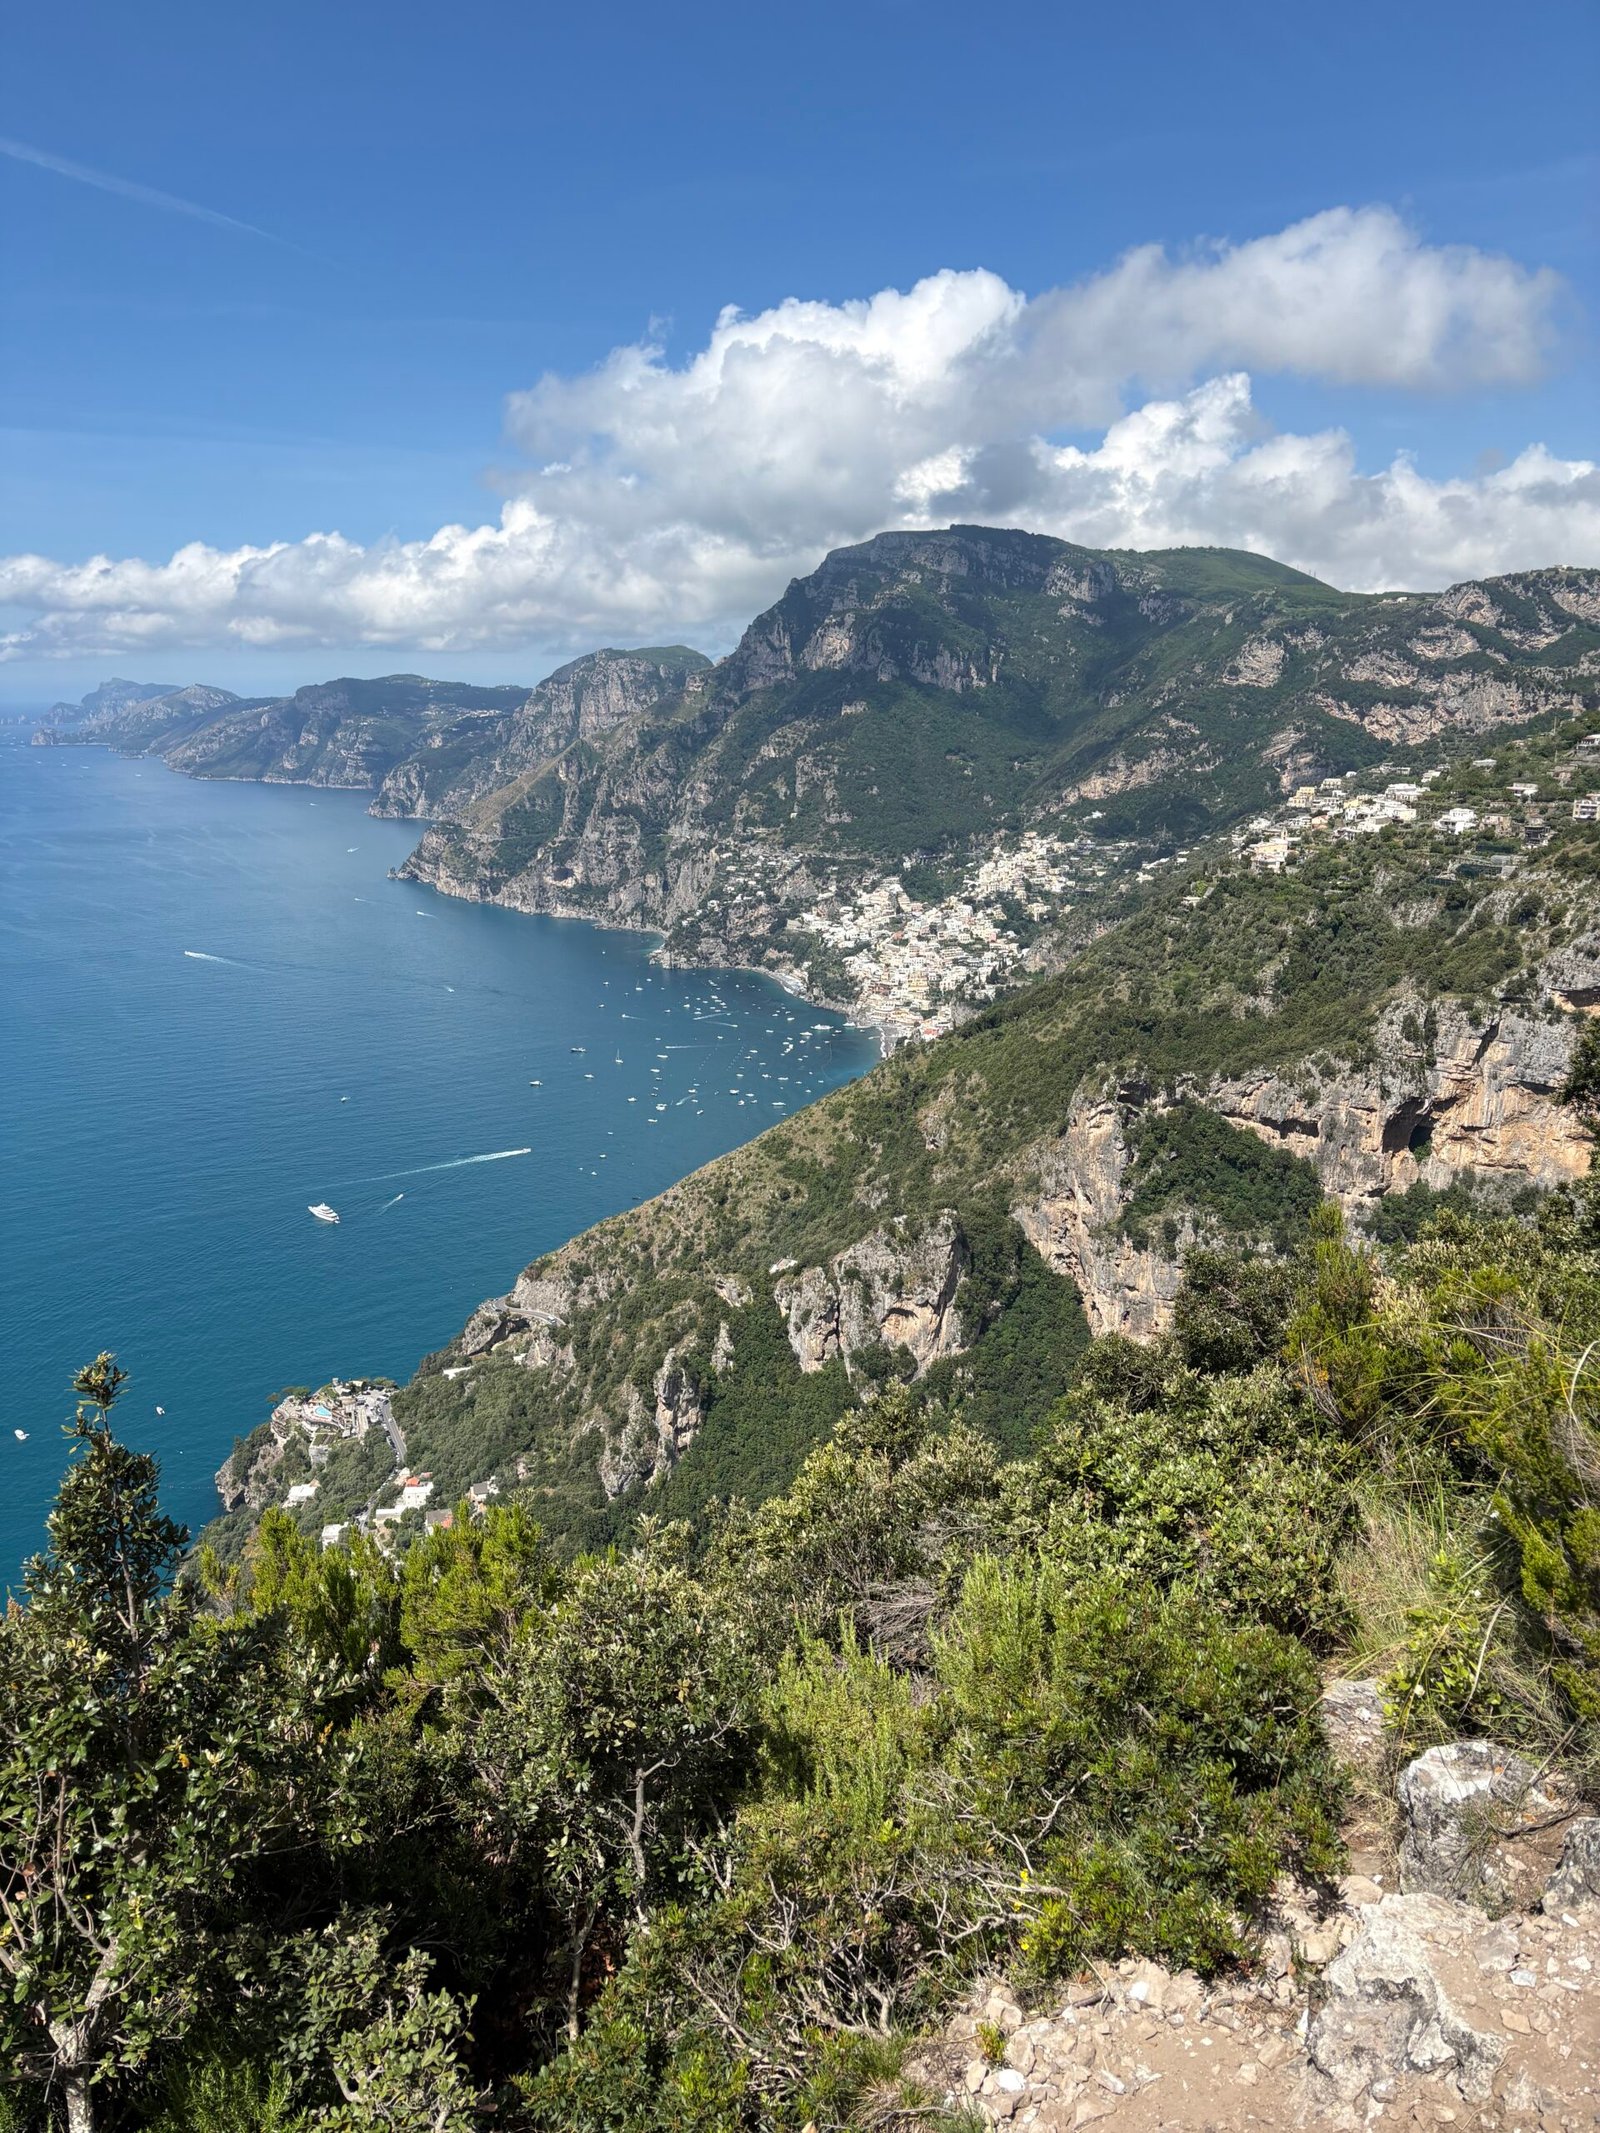
Hiking the Path of the Gods independently from Amalfi is straightforward once you know how the day fits together. Here is the firsthand route from Amalfi to Bomerano, across the trail to Nocelle, down to Positano and back by ferry.
How to Hike the Path of the Gods from Amalfi: Bus, Trail and Return Logistics
If you are staying in Amalfi Town, hiking the Path of the Gods is very doable without a tour or private transportation. The hike itself was straightforward; getting to the trailhead and figuring out what to do at the other end required considerably more research.
I hiked from Bomerano to Nocelle in May, then took a local bus down toward Positano and a ferry back to Amalfi. I would absolutely do it again. The trail had extraordinary views, enough challenge to make it satisfying and far fewer people than the coastal towns below.
The part I wish had been clearer before I went was the logistics.
Affiliate disclosure: This article contains affiliate links. If you book or buy through one of them, I may earn a commission at no additional cost to you. This does not affect the recommendations or comparisons in the article.
The route at a glance
Experienced in May 2026
Start: Amalfi Town
Bus: SITA bus from Amalfi → Bomerano
Trail: Bomerano → Nocelle
Distance: About 5.7km
Hiking time: Around 2 hours at a steady pace, including photo and short rest stops
Difficulty: Moderate
After the hike: Local bus from Nocelle towards Positano
Return: Ferry from Positano → Amalfi Town
I took a 10 a.m. bus from Amalfi, completed the hike without rushing and was back in Amalfi by mid-afternoon.
SITA operates the public buses along the Amalfi Coast, including the Amalfi–Agerola route used to reach Bomerano. Timetables change seasonally, so check the current schedule on the official SITA Sud Campania timetable page before your hike rather than relying on an old blog timetable. Check current SITA Sud schedules
Check before you go
Transport schedules, fares and ticketing arrangements can change. I completed this route in May 2026; check the linked official transport sources for current information before your hike.
Is the Path of the Gods worth doing?
Absolutely!
For me, this was one of the highlights of the Amalfi Coast. The scenery is spectacular, with long views over the coastline, but the experience also feels very different from walking through crowded Amalfi or Positano.
It is not exactly undiscovered. There were other hikers around throughout the route, and several groups from my bus ended up moving along the trail at roughly the same time. But people spread out quickly according to their pace, so it never felt crowded. Travelling alone, I actually appreciated seeing other hikers periodically because I never felt isolated.
It also has just enough difficulty to feel like you have done something more substantial than sightseeing.
Why I hiked from Bomerano to Nocelle
I chose the Bomerano-to-Nocelle direction because it was the direction I saw recommended most often while researching the hike. It is generally described as the more downhill option, which is broadly true, but I would not interpret that to mean the trail is all downhill. There were still plenty of uphill sections, along with rocky and fairly steep stretches.
The other advantage became obvious once I started walking: travelling in this direction puts many of the best views of the Amalfi Coast in front of you. Bomerano sits up in the hills above the coast, while Nocelle is a small hill town above Positano. Walking between them means those coastal vistas open up ahead of you rather than repeatedly requiring you to turn around to see them.
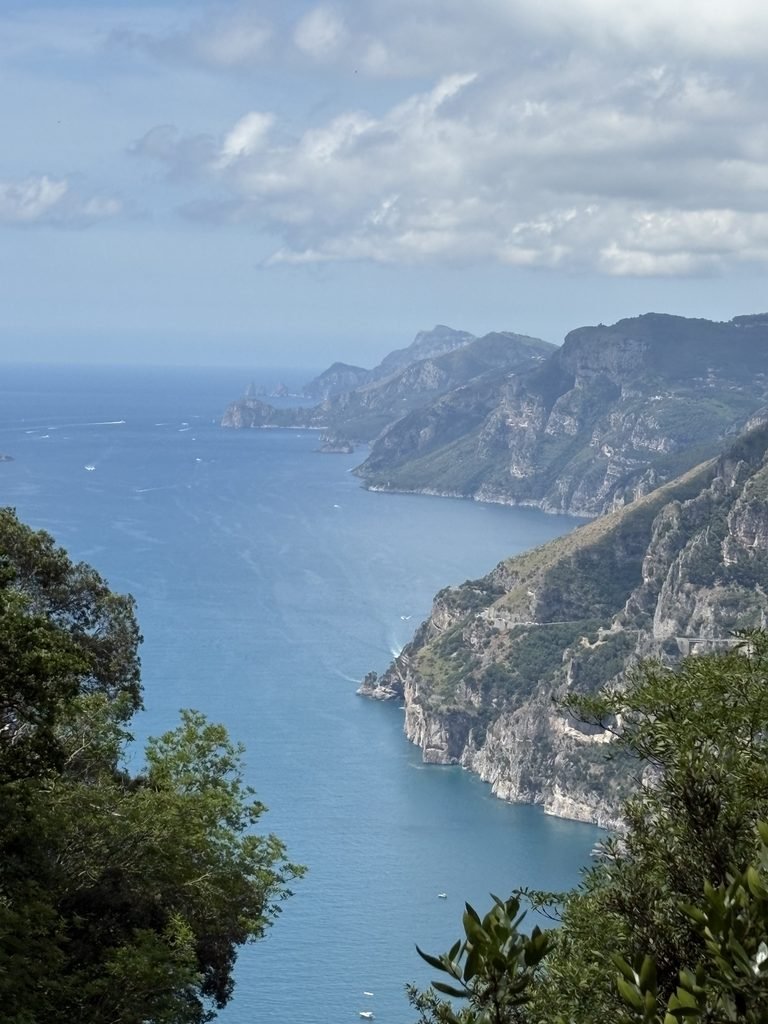
How difficult is the Path of the Gods?
I would rate the hike as moderate. There were flat sections, forested stretches that provided a welcome break from the sun, rocky sections and some steeper climbs and descents. I did not encounter anywhere that made me feel extremely exposed; in several places where the trail approached a drop or viewpoint, there were railings that also made useful places to stop and take in the scenery.
You should still have a reasonable level of fitness, and good knees will help. On a few steeper descents I slowed down considerably and occasionally used the railings for extra support. Some hikers carried trekking poles. I did not need them, but I could see them being useful if you have knee issues or want more stability on the downhill sections.
The weather made a difference too. I walked on a warm, dry day, which made the trail much easier to manage.
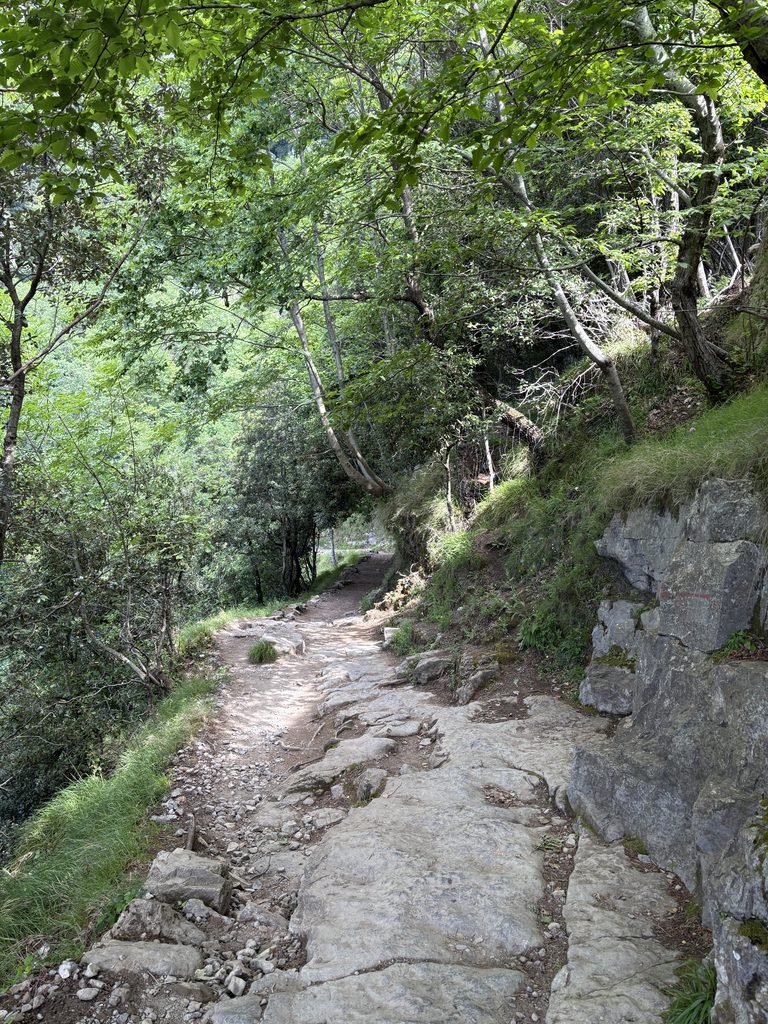
What shoes do you need?
I wore Skechers Go Walks. For the dry conditions I had, they were comfortable and handled the trail perfectly well, although they were extremely dusty by the end and needed a thorough cleaning.
I would feel differently if the trail had recently been wet. There are rocky and uneven areas where better grip would become much more important. In warm, dry weather, I could also see a good-quality hiking sandal working well for someone accustomed to hiking in them.
This is not a hike where I personally felt I needed heavy hiking boots, but footwear should match the trail conditions rather than simply the distance.
Bring water with you
I carried water, a couple of granola bars and an apple. I never actually needed the food during the hike, but the water was essential. It was warm and there are substantial stretches exposed to the sun.
I did not see anywhere to refill water once I was on the trail. Bomerano has shops where you can buy water and snacks before walking to the trailhead, and several people from my bus stopped there before starting. If you arrive without enough water, this is the time to stock up.
Getting from Amalfi to Bomerano by SITA bus
This was the part that was much less obvious than the hike itself.
I took the 10 a.m. SITA bus from Amalfi toward Bomerano. It was line 5080 on the Amalfi–Agerola–Naples route, and the journey took about 40 minutes with traffic.
The road climbs into the hills and the views along the way are excellent. I arrived early enough to get into the queue, and although the bus was full, it was not overloaded. I had a seat for the trip.
That was in mid-May. In peak summer, I would allow more time and be more cautious about assuming the same experience.
Where to buy the bus ticket in Amalfi
This was surprisingly confusing.
Before going, I found multiple sources saying that bus tickets were available from local shops. I tried several shops around Amalfi — including places that were specifically listed online as ticket sellers — and none sold them. Several had signs explicitly saying they did not sell bus tickets.
After asking around, I eventually learned that a man wearing a yellow vest near the bus area by the docks was selling them. I bought a one-way ticket from him in cash.
The bus area appears on Google Maps as Amalfi Terminal, but do not expect anything resembling a formal bus terminal. The location and ticket process were not particularly well signposted, so I would arrive with some extra time rather than assuming you will immediately know where to go.
Getting off in Bomerano
The driver was helpful and told those of us heading for the Path of the Gods where to get off. Bomerano itself is a small town in the hills, with a central area and shops where you can buy water or snacks before starting.
From the bus stop, I did not find the route to the trailhead particularly well marked. I used Google Maps to navigate through town until I reached the start. Once you arrive at the trailhead, however, there is a large sign and it is obvious that you are in the right place.
From that point, the navigation becomes much easier.
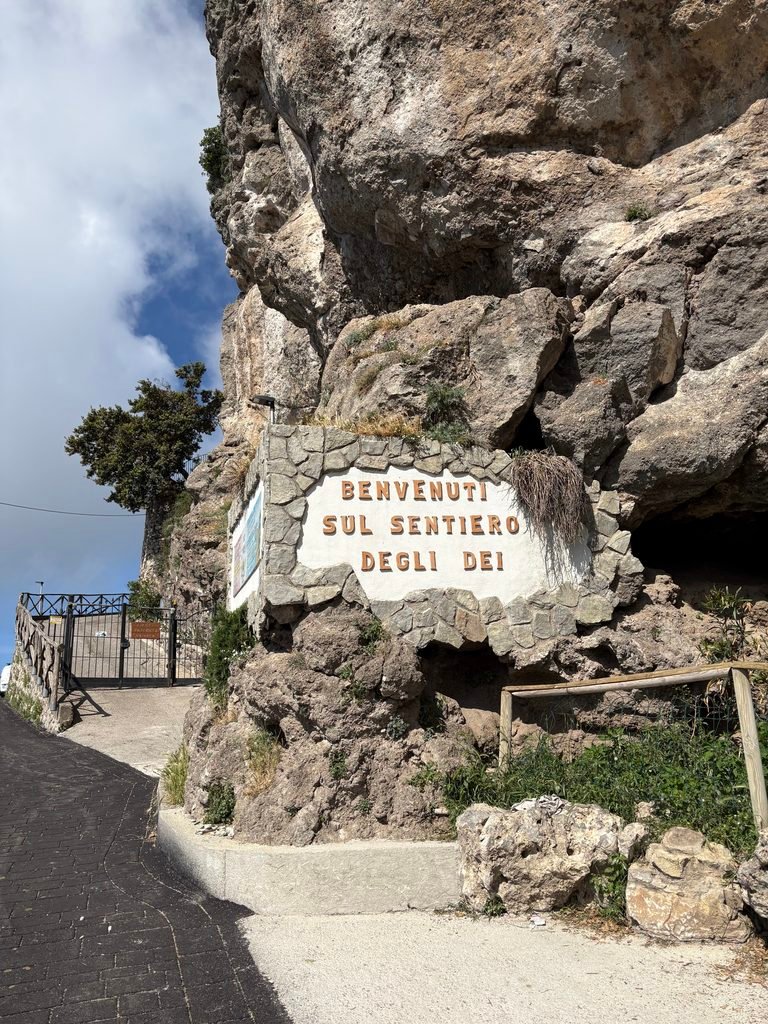
Is the trail easy to follow?
Mostly, yes.
There was not a huge amount of signage along the route, but most of the time there was only one obvious trail to follow. At one point, I encountered a branch where I could either descend a set of stairs or stay on a higher route to the right. I took the stairs, and the two routes eventually met again.
That was the exception rather than the rule. I did not spend the hike repeatedly wondering whether I was still on the Path of the Gods.
The scenery also makes it very tempting to stop frequently, so allow some extra time beyond whatever pace you would normally expect to walk 5.7 kilometres.
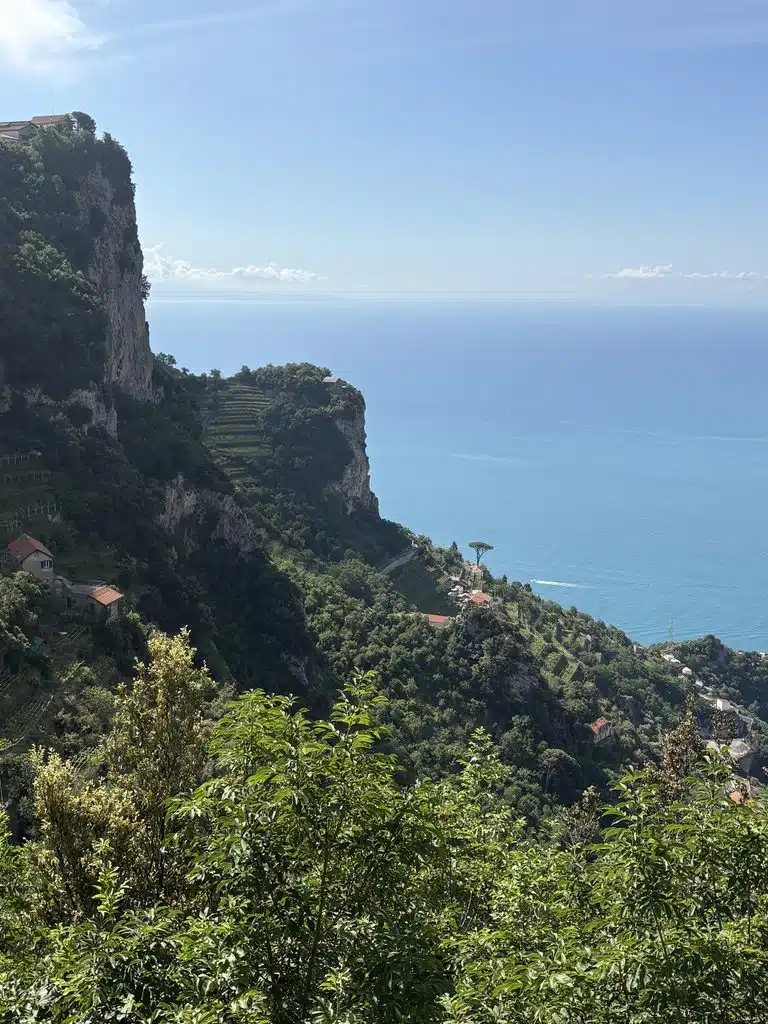
What the hike itself was like
The trail changes character throughout the walk. Some sections are rocky and require more concentration, others are relatively flat, and there are stretches through forest that provide welcome shade before the trail opens again to views over the coast.
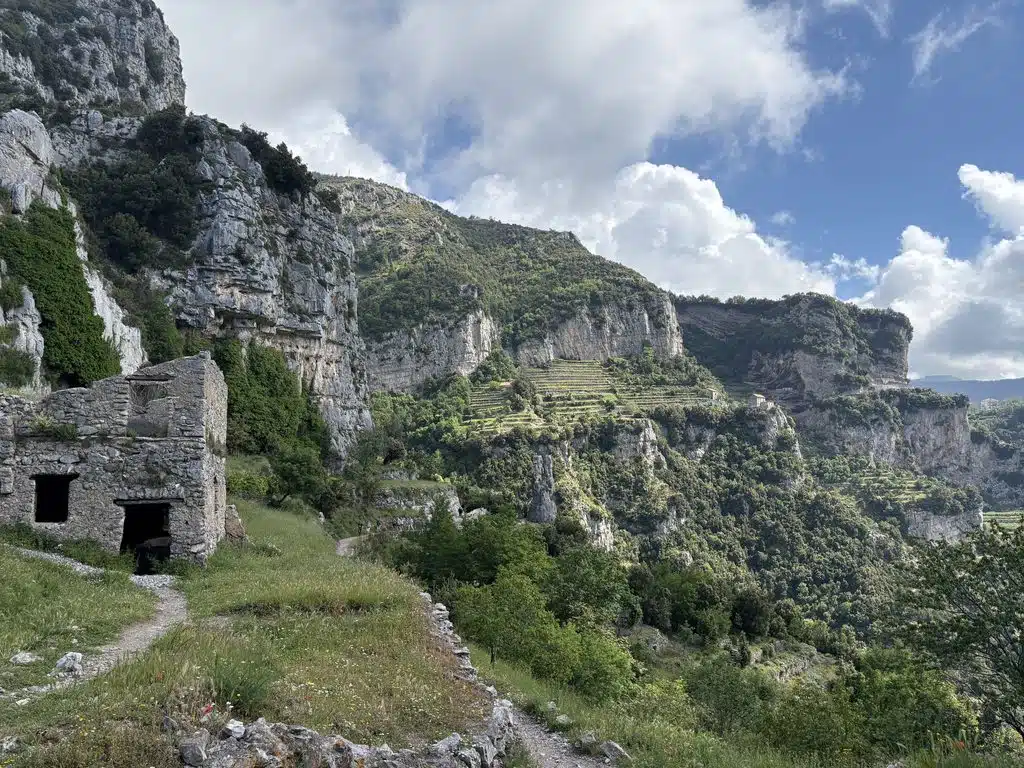
Those views are the main reason I would recommend the Bomerano-to-Nocelle direction. Much of the scenery unfolds ahead of you as you walk.
I kept a steady pace but stopped regularly for photographs and a few short rests. My total walking time was around two hours, possibly a little under rather than over.
I had read beforehand that the Path of the Gods could be very crowded and that starting extremely early was important. I deliberately chose not to do that because I wanted a relaxed morning and did not want to structure the day around another very early start.
In mid-May, the 10 a.m. bus worked well for me. The first part of the trail was naturally busier because several people had arrived together, but everyone soon spread out according to pace. In hotter weather or peak summer, an earlier start could make much more sense.
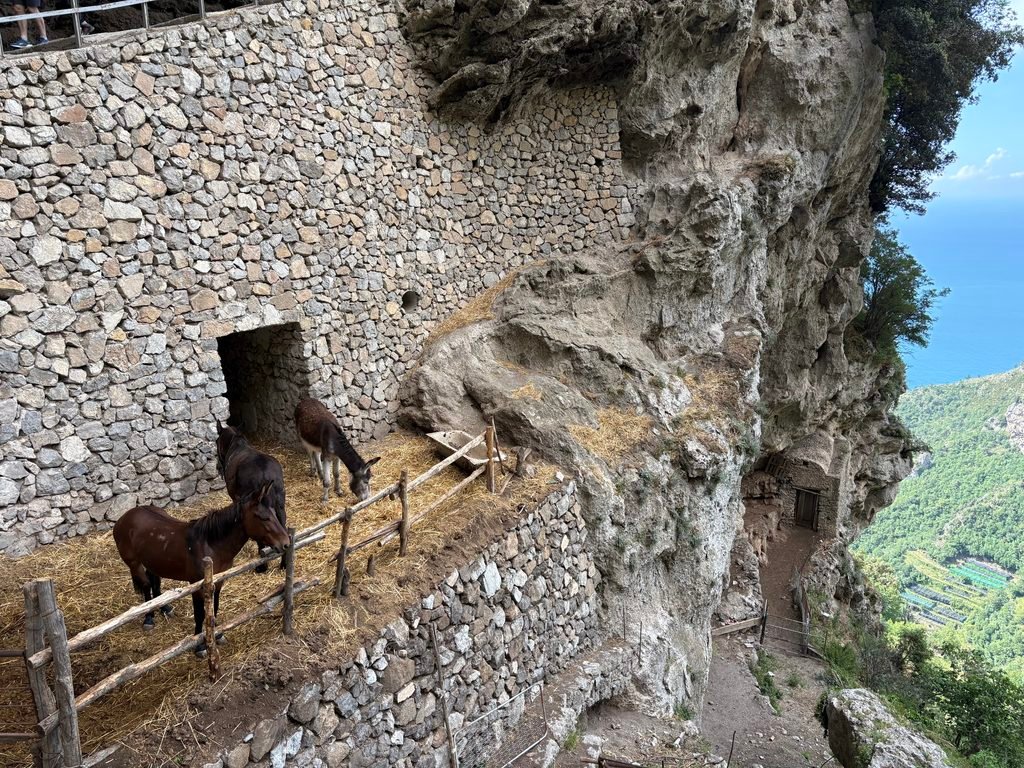
Arriving in Nocelle
The trail finishes in Nocelle, a quiet little settlement in the hills above Positano. There was a café near where I entered town, although I did not stop, and the lanes were narrow, pedestrian and remarkably quiet after the busier towns along the coast.
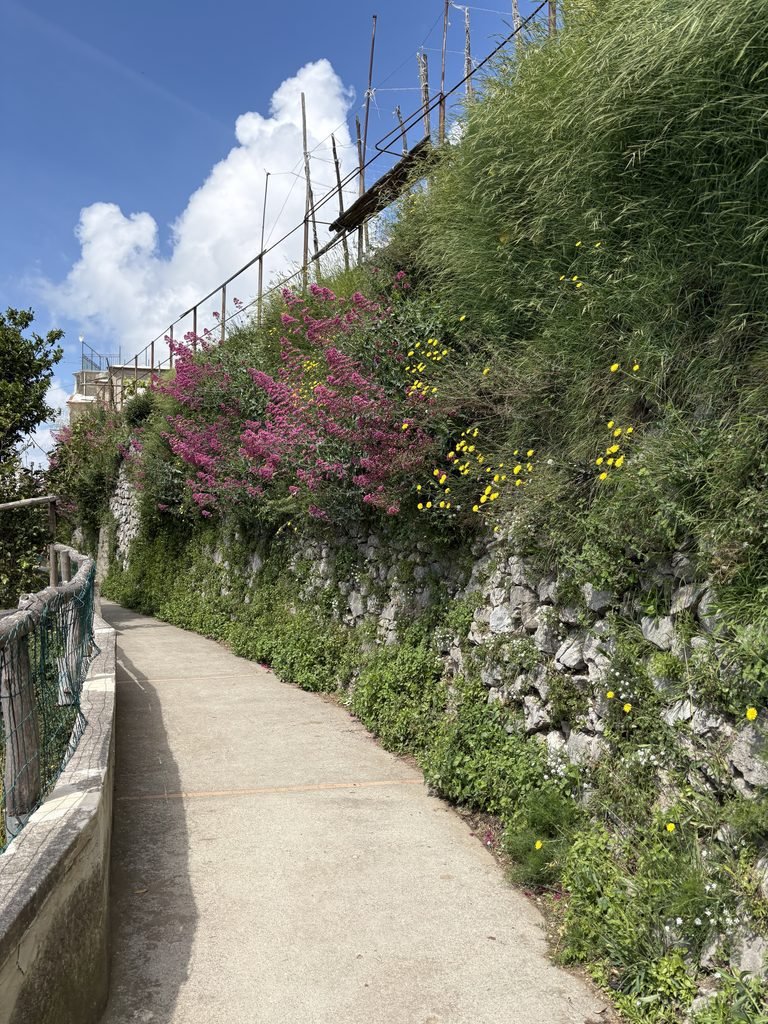
This was also where my carefully researched plan became less useful.
I knew there was a very long staircase that could eventually take me downhill toward Positano. At one point I came to stairs heading down from the route through Nocelle and started descending them, then stopped. I was not sure whether these were actually the stairs I had read about and did not want to commit to hundreds of steps before knowing where I was going.
I chose to continue exploring at the upper level instead. In doing that, I suspect I missed the church and some of the lower part of Nocelle, although I cannot say with certainty where those particular stairs would have taken me.
Finding the bus from Nocelle
Eventually I saw a handwritten sign pointing toward a bus. I followed it up a small set of stairs and found one of the least obvious bus stops I have ever used: essentially a spot beside a winding mountain road with no shelter and very little signage.
For several minutes, I wondered whether I had actually found the right place. A few other travellers eventually appeared and waited with me, which was reassuring. There may be a more obvious stop elsewhere in Nocelle; this is simply the one I managed to find.
The local bus eventually arrived and I paid the driver onboard. The fare was around €1.80, but I did not have exact change. That did not make the driver particularly happy, and I ended up paying about €2. Based on that experience, I would carry small coins.
The bus to Positano took longer than expected
I had seen estimates suggesting that the trip down toward Positano takes only 10 or 15 minutes. Mine was considerably longer.
The bus was tiny, and many passengers were standing. As we approached Positano, traffic became very heavy and the journey stretched to roughly 40 minutes.
This was in mid-May, which made me wonder how much worse the road becomes at the height of summer. It is another reason I would avoid planning the end of the hike around a tight ferry connection: the walking time is reasonably predictable; traffic down the mountain is not.
Getting back to Amalfi by ferry
Once I reached Positano, I walked through part of town but found the narrow streets extremely busy. Rather than trying to add more sightseeing, I headed toward the beach and ferry docks, where there was much more open space.
I bought a Travelmar ticket directly from one of the booths for the next ferry to Amalfi for about €10. There was no complicated process: I was told to wait nearby, and as ferries were ready to board, staff held up signs showing the destinations so passengers knew where to queue.
The ferry back to Amalfi took only about 15 minutes. After buses, mountain roads and hiking, finishing the loop on the water was a particularly pleasant way to return.
Could children hike the Path of the Gods?
Yes — if they are comfortable walking roughly 5.7 kilometres on uneven terrain.
I would not describe this as a hike for very small children walking independently. There are rocky stretches, climbs and descents, and it requires sustained walking. For an older or reasonably fit child who enjoys hiking, I think it is very achievable.
A small child in an appropriate hiking carrier is a different question, but the trail is absolutely not stroller-friendly.
Parents should also think about the entire outing rather than only the 5.7-kilometre hike. The day includes the bus up to Bomerano, the trail, figuring out Nocelle, another bus down the mountain and transportation back to wherever you are staying. The walking may not be the part that tests everyone’s patience.
What I would do differently
Not much. The 10 a.m. departure worked well in the weather I had, and I appreciated not forcing myself into an early start simply because that was what some advice recommended. I would still bring plenty of water and light snacks, and I was comfortable with my footwear in dry conditions.
The main thing I would change is Nocelle. Next time, I would spend a little more time exploring the town and perhaps be less suspicious of every staircase. If my knees were feeling cooperative, I might even try the full descent toward Positano.
I would also bring smaller change for the bus driver.
A note for planners like me
I like knowing how a trip is going to work before I set out. Where does the bus leave? Where do I buy the ticket? Which direction do I walk? What happens when the trail ends?
That is partly why I wanted to put all of these details in one place. If having the logistics worked out makes you more comfortable, hopefully this gives you a much clearer starting point than I had.
But one of the things I liked about this day was that not everything was completely clear.
I had to ask someone where to buy a bus ticket. I used Google Maps to find the trailhead. I stood beside a mountain road wondering whether a bus was actually going to appear. In the end, it all worked.
Giving yourself enough time to figure something out can be part of the satisfaction of travelling independently. The useful distinction is between leaving room for uncertainty and building an itinerary so tightly that every uncertainty becomes a problem.
Prefer to have the logistics handled for you? Compare current guided Path of the Gods options below.
The practical takeaway
The Path of the Gods was easier to hike than it was to research.
Once I was on the trail, the route was mostly obvious and the experience was exactly what I had hoped for: spectacular scenery, a manageable physical challenge and a quieter way to experience the Amalfi Coast.
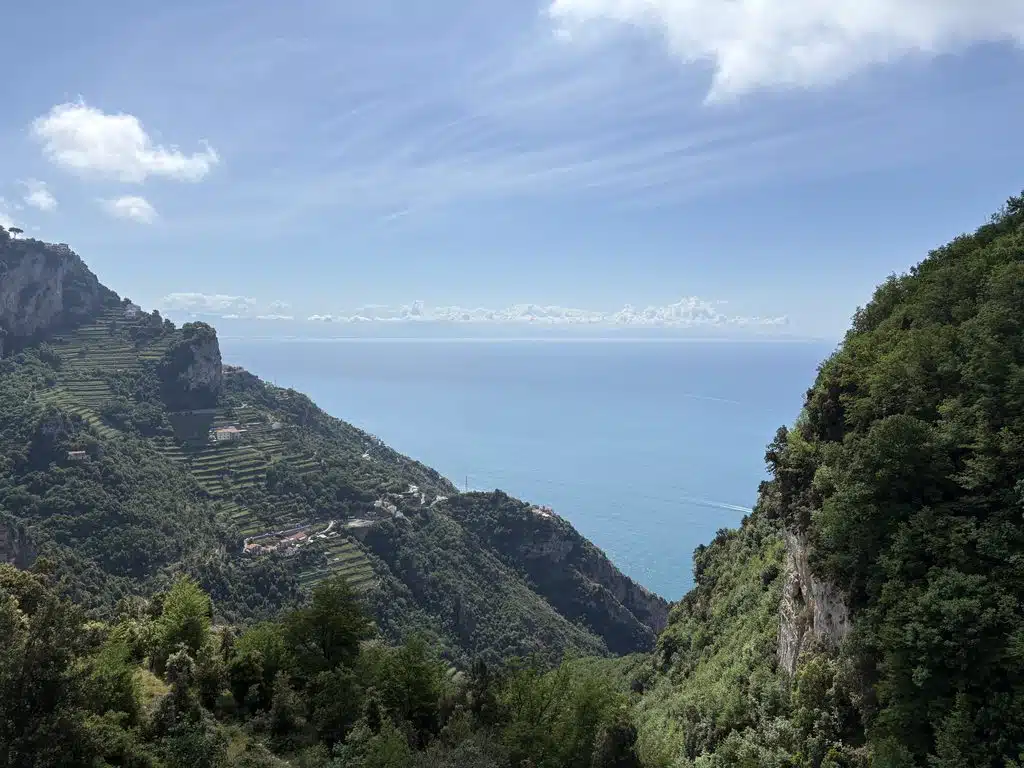
The confusing pieces were around it — buying the bus ticket in Amalfi, finding the trailhead in Bomerano and working out how to leave Nocelle afterward.
If you are starting in Amalfi Town, I would do essentially the same route again:
SITA bus to Bomerano → hike to Nocelle → local bus toward Positano → ferry back to Amalfi.
Give yourself enough time that a full bus, traffic jam or unclear sign does not become a crisis, carry your own water, and do not plan the day so tightly that you have to race through the reason you came.
The logistics require a little patience. The hike is worth it.
More from this trip
- How I Planned Four Nights Across Capri, the Amalfi Coast and Naples
- Is Staying Overnight in Capri Worth It?
- Why I Chose Amalfi Town as My Base
- Italy by Train and Ferry: Strikes, Connections and How Much Buffer to Leave
Plan your own trip
Know How You Travel
Understand how pace, comfort and the number of hotel changes fit the way you travel.
Plan Your Trip
Build a route around the time, priorities and logistics that actually matter.
Explore more of Italy
Planning more of Italy? Explore our firsthand articles and practical advice from Rome, Capri, the Amalfi Coast and Naples.
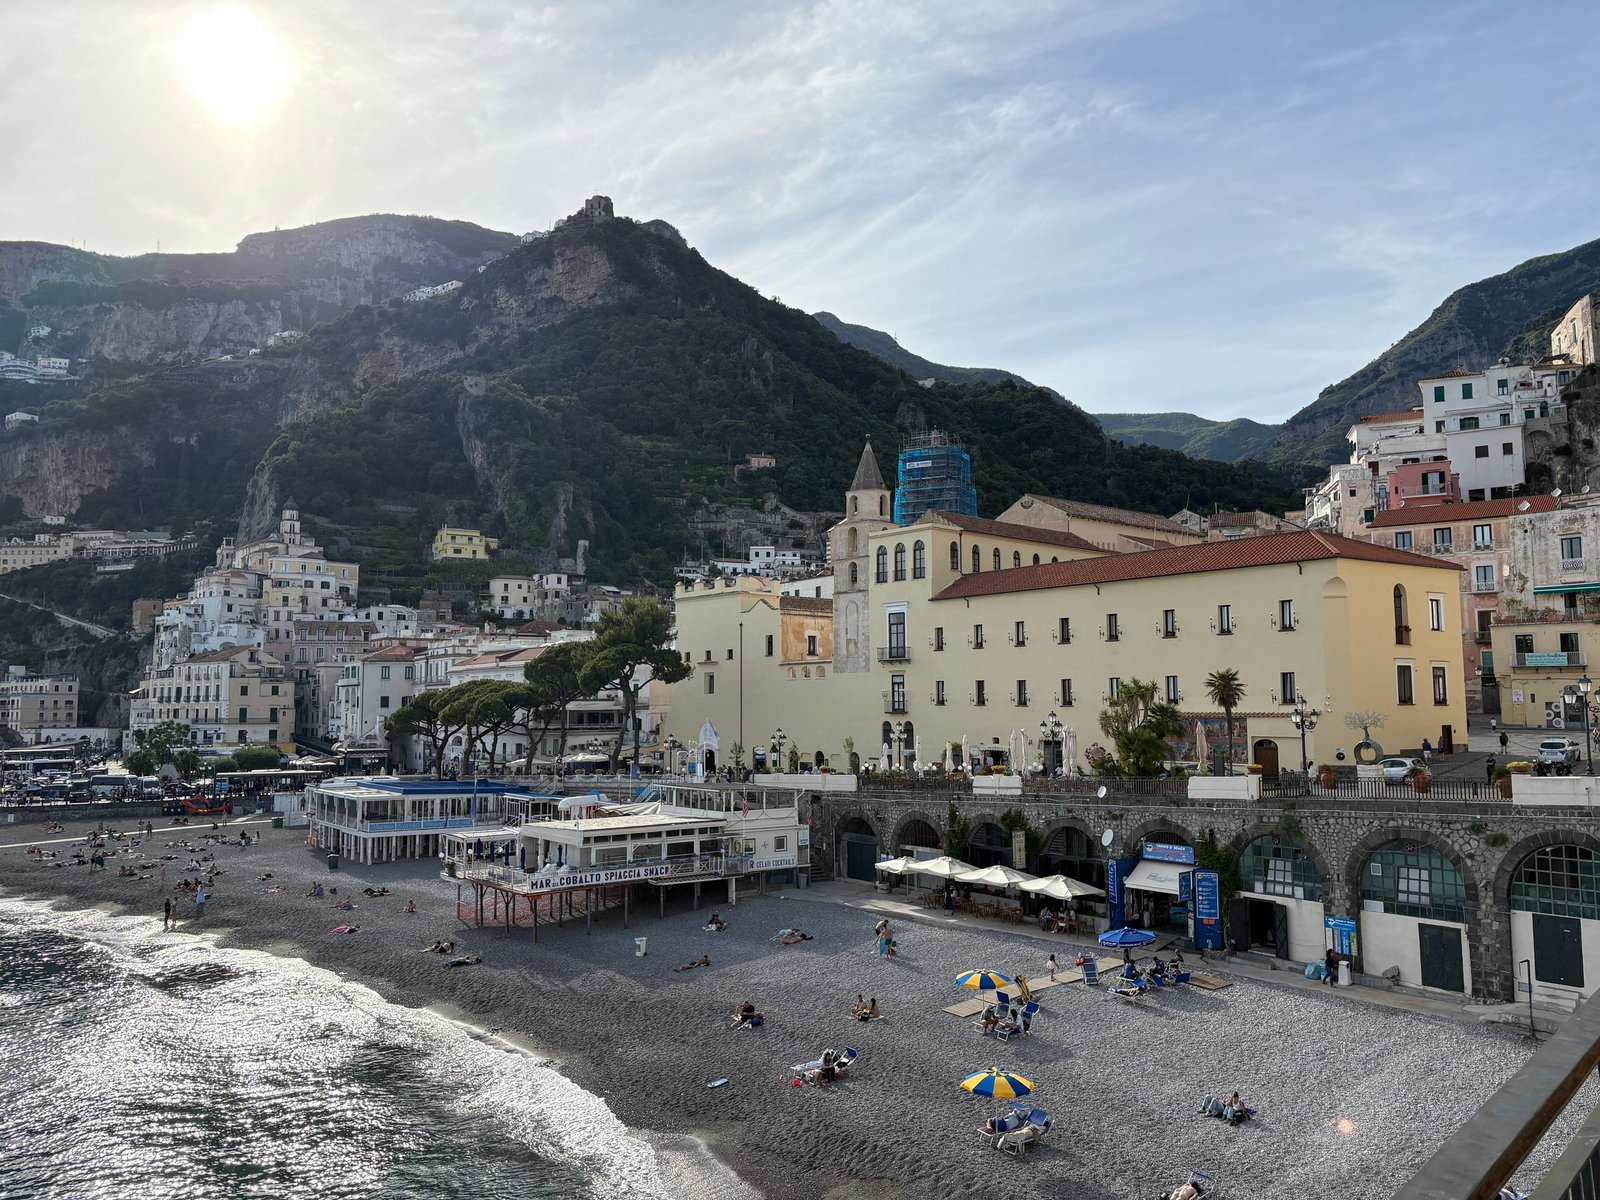
Four nights was not enough to see Capri, the Amalfi Coast and Naples properly, but it was enough to build a satisfying route around a few clear priorities. Here is how I divided the time, what I left out and why the itinerary worked for this particular trip.
How I Planned Four Nights Across Capri, the Amalfi Coast and Naples
Four nights is not enough time to see Capri, the Amalfi Coast and Naples properly, but it was enough to get a taste of the region — and to make me want to come back one day.
My time was limited by a work schedule, and I already knew I would fly home from Naples. That gave me a fixed endpoint and only a few days to decide what to do between Rome and that final flight. After several days in the city, the sea, open spaces and nature were particularly appealing, so I settled on:

Getting there required some hard choices. Pompeii, Ravello and several other places were tempting, but four nights could not support all of them without turning the trip into a race. The itinerary I ended up with was short, but very satisfying.
Affiliate disclosure: This article contains affiliate links. If you book or buy through one of them, I may earn a commission at no additional cost to you. This does not affect the recommendations or comparisons in the article.
The quick decision
This is an assessment of this specific four-night route, not a recommendation for how long the Amalfi Coast deserves overall.
Best for…
Travellers with limited time who want a taste of Capri and the Amalfi Coast, are comfortable changing bases and do not expect to explore any one place deeply.
Add more time if…
You want Ravello, Pompeii, more hiking or nature, additional time on Capri, beach days or a slower experience of the coast.
Choose fewer bases if…
Hotel changes drain you, you are travelling with substantial luggage or you would rather settle into one place than use several short stays.
Why I chose four nights
Four nights was driven primarily by the time I had available. There was very little room to extend the trip, so the real question was how to use those days well.
I had been to Italy several times but never travelled south of Rome. Since I could fly home from Naples rather than returning to Rome, this seemed like a good opportunity to get a first look at a part of the country I had not experienced before.
Research quickly revealed the problem: there was far more within reach than I could realistically fit in. Capri, the Amalfi Coast, Pompeii, Ischia and Naples itself all looked appealing. I knew I did not want to spend the entire extension in another city, though. After Rome, I was much more interested in getting toward the coast, spending time outside and building at least one substantial hike into the trip.
The fourth night became particularly important once I decided the Path of the Gods was a priority. Trying to do the hike while checking out, managing luggage and moving to another base would have created exactly the kind of day I wanted to avoid.
Travelling solo made the resulting pace much more manageable. I had only my own luggage, energy and timing to manage, and I was travelling with a small carry-on roller and a daypack. I would plan the same four nights differently with a family.
Why Capri came first
I left Rome on a 9:41 a.m. train, which arrived in Naples at 10:53 a.m. I deliberately avoided the earliest possible departure because I did not want the personal part of the trip to begin with an unnecessarily rushed morning.
From Napoli Centrale, I took the metro toward the port. Public transportation was easy and well connected, and I could simply tap my Wise card rather than stopping to work out a separate ticket.
I had intentionally left a generous buffer before my 11:55 a.m. NLG ferry to Capri. There was an earlier ferry that looked possible on paper, but I worried the connection would be too tight. I was right: even with a straightforward metro trip from the station, I would not have made that earlier boat comfortably.
That extra buffer looked inefficient when I was planning, but it meant I did not need to race across Naples or start worrying the moment the train lost a few minutes. The details of trains, ferries and the strike uncertainty around this trip deserve their own practical article; the important lesson for this itinerary was that I preferred protecting the connection to maximizing every available minute.
Capri also kept the route moving logically toward the coast rather than spending the first night back in Naples. The final night in Naples was already spoken for because my flight home departed at 9 a.m., and I was not willing to depend on an early ferry from the coast before an international itinerary.
My actual ferry experience reinforced that decision. The Naples-to-Capri crossing arrived about 30 minutes late because of very rough seas, and the following day the Capri-to-Amalfi ferry skipped Positano entirely because the conditions prevented it from entering the port. Ferries are useful, but I would not build a flight connection around the assumption that they will always operate exactly as planned.
For the full breakdown of that part of the trip, see Is Staying Overnight in Capri Worth It?
One night in Capri was enough for this route
I wanted more from Capri than a rushed day trip, but I also did not want the island to take up most of my limited time.
One night at Hotel Syrene let me explore Anacapri and Capri Town after arriving, experience the quieter streets once the day-trip crowds had left, and take a boat trip around the island the following morning before continuing to Amalfi.
For this itinerary, that was the right allocation. With more time, I could easily have stayed another night to explore more of Capri’s coastal paths and quieter areas, but one night was enough to make the island feel like somewhere I had stayed rather than somewhere I had simply passed through.
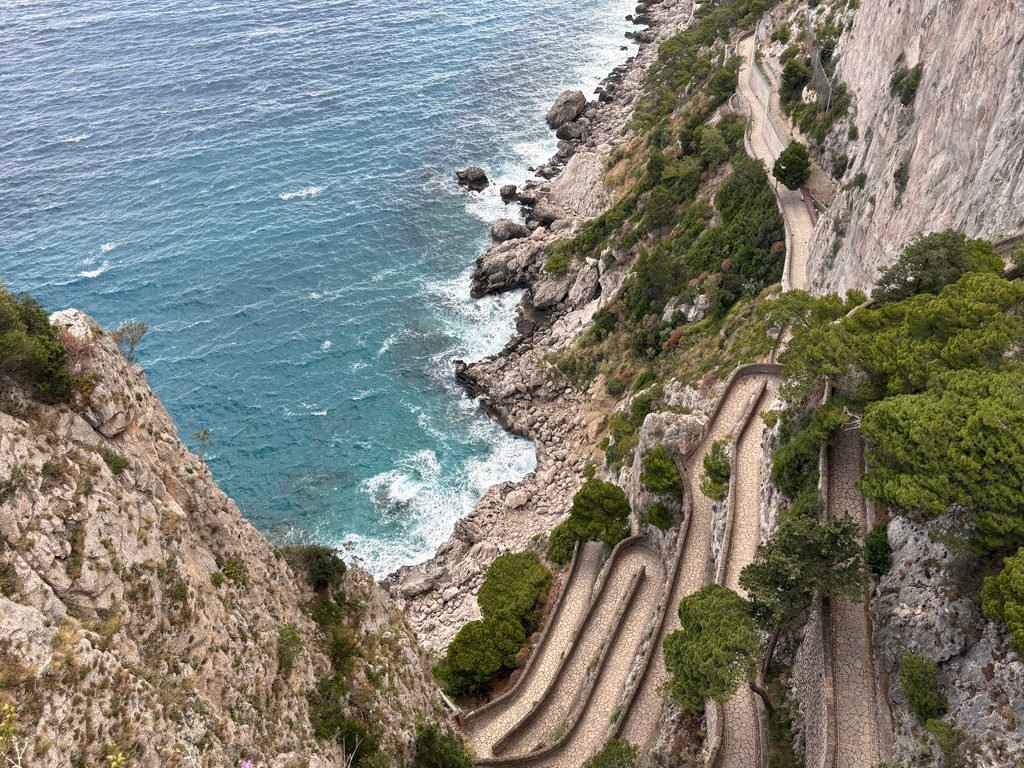
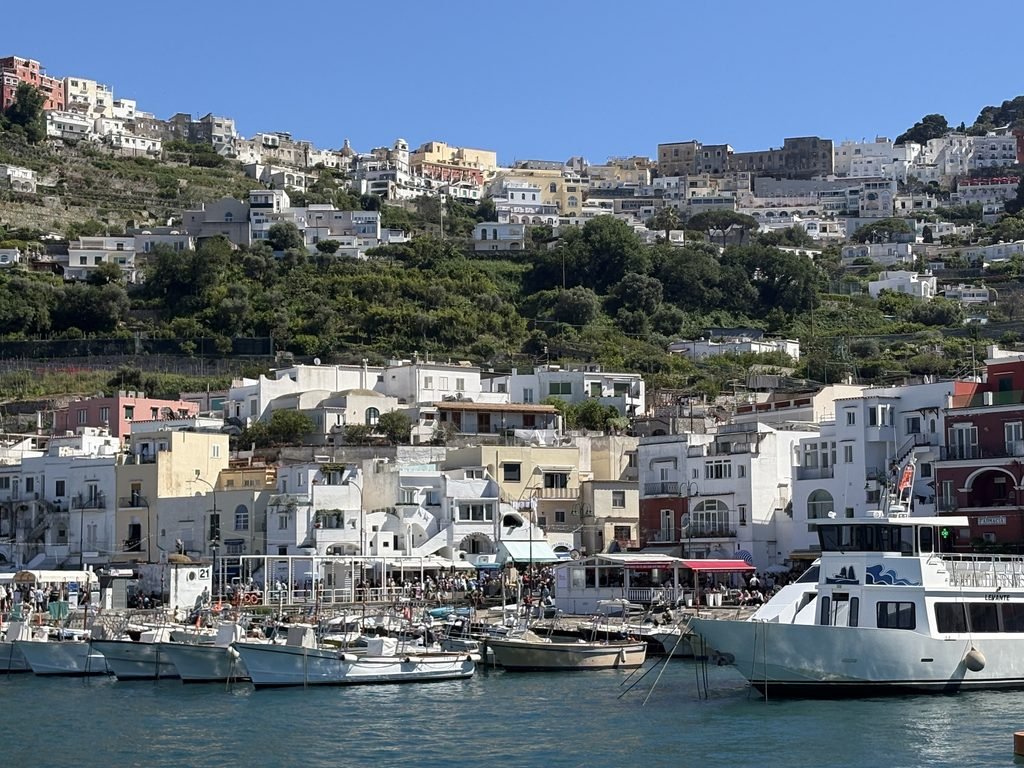
Why I chose Amalfi Town as the main base
The biggest accommodation decision was where to put the two central nights.
I considered Positano, Ravello, Sorrento and Amalfi Town. Amalfi won because it aligned best with the actual trip: it is a major ferry stop, has useful connections to Capri and Naples, and looked easier to manage with luggage than Positano, where stairs are a much bigger part of getting around.
Sorrento is well connected, but for this trip it felt too far outside the stretch of coast I wanted to experience. Ravello appealed to me, but I would not choose it as a base for this kind of trip. Its location higher in the hills adds another transfer whenever you arrive or leave. For a slower stay where frequent movement and coastal sightseeing were not priorities, that could be much less of a drawback.
Most importantly, Amalfi Town was a practical base for the Path of the Gods. Two nights meant I could arrive, settle in, spend the next day hiking and leave for Naples the following day without combining the hike with a hotel change.
Looking for a base in Amalfi Town? Compare current hotel options and prices below.
Giving the Path of the Gods its own day
The Path of the Gods became the anchor of my Amalfi stay.
I took the 10 a.m. bus from Amalfi toward Bomerano, a small town in the hills above the coast and the starting point I had chosen for the hike. It was bus 5080, Amalfi–Agerola–Naples, and the journey took about 40 minutes with traffic.
The ride itself was enjoyable. The road climbed into the hills with beautiful views, and I had a seat for the journey. Buying the ticket was considerably less straightforward.
Before the trip, I had found several references saying that local shops around Amalfi sold bus tickets. I tried multiple shops — including some specifically listed online — and none sold them. Several had signs stating that they did not sell bus tickets at all.
Eventually, after asking around, I discovered that a man in a yellow vest near the bus area by the docks was selling them. I paid cash for a one-way ticket and waited near what Google Maps calls Amalfi Terminal, which sounds much more formal than it looks in person.
The bus driver was helpful and told those of us heading to the Path of the Gods where to get off in Bomerano. From the bus stop, the trailhead was not particularly obvious, so I used Google Maps until I reached the marked route.
The hike itself was one of the highlights of the trip. The views along the coast were extraordinary, and the trail felt much quieter than the towns below while still having enough other hikers around that I never felt isolated travelling alone. I took a little over two hours to reach Nocelle, another small town in the hills above Positano, with plenty of stops for photos.
There is enough to say about the hike — the route, transportation, difficulty and what I would do differently — that it deserves its own article. For this itinerary, the key point is that giving it a full day meant I could actually enjoy it rather than treating it as something to squeeze between transfers.
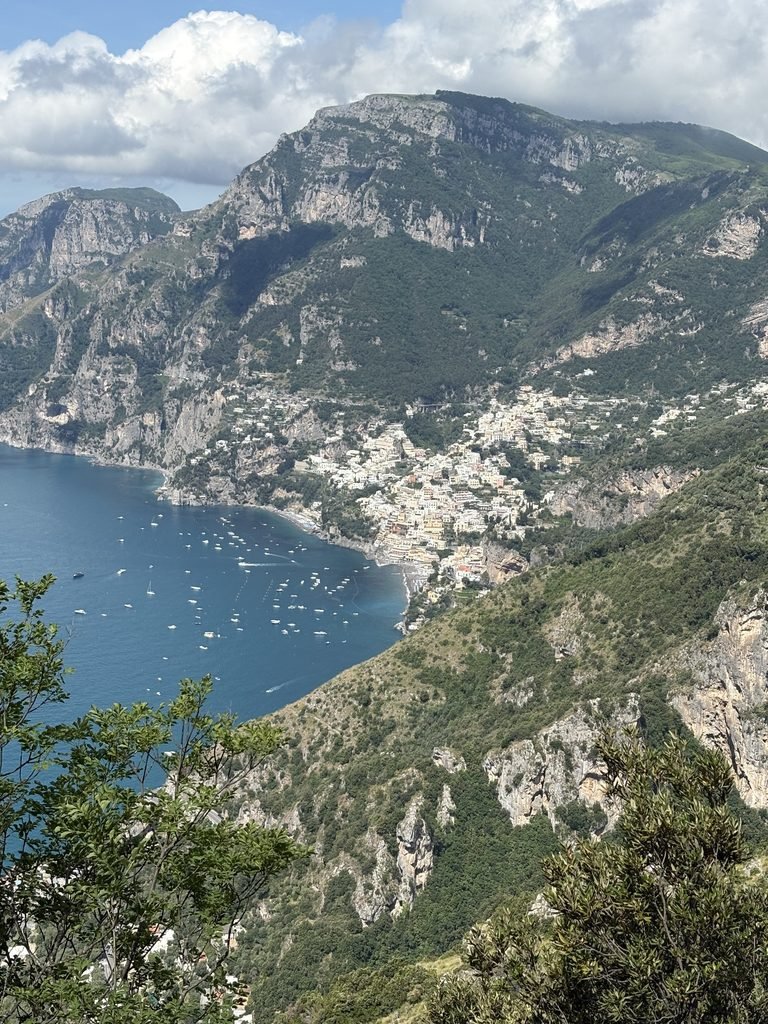
Getting from Nocelle to Positano was less obvious than expected
From Nocelle, it is possible to walk roughly 1,000 steps downhill toward Positano. After the hike, I had no desire to add that simply because it was an option, so I looked for the bus instead.
Finding it was not particularly intuitive. I continued through Nocelle until I eventually saw a sign pointing up a set of stairs toward a bus stop. The stop itself was tiny: no shelter, very little signage and not much reassurance that I was standing in the right place.
For a while, I wondered whether I had misunderstood where to wait. A few other travellers eventually appeared, which made me feel considerably better about my choice of roadside location. There may be a more obvious place to catch the bus, but I could not find it.
The bus was small and became increasingly crowded as it wound down the mountain roads toward Positano. I paid cash to the driver, and the ride took roughly 30 minutes.
Once there, I walked through part of Positano and visited the church, but the narrow streets were extremely crowded in the middle of the day. I made my way toward the beach and docks fairly quickly, bought a ticket for the next ferry back to Amalfi and enjoyed the coastal views while I waited.
Positano is undeniably beautiful. For this trip, that short visit was enough.
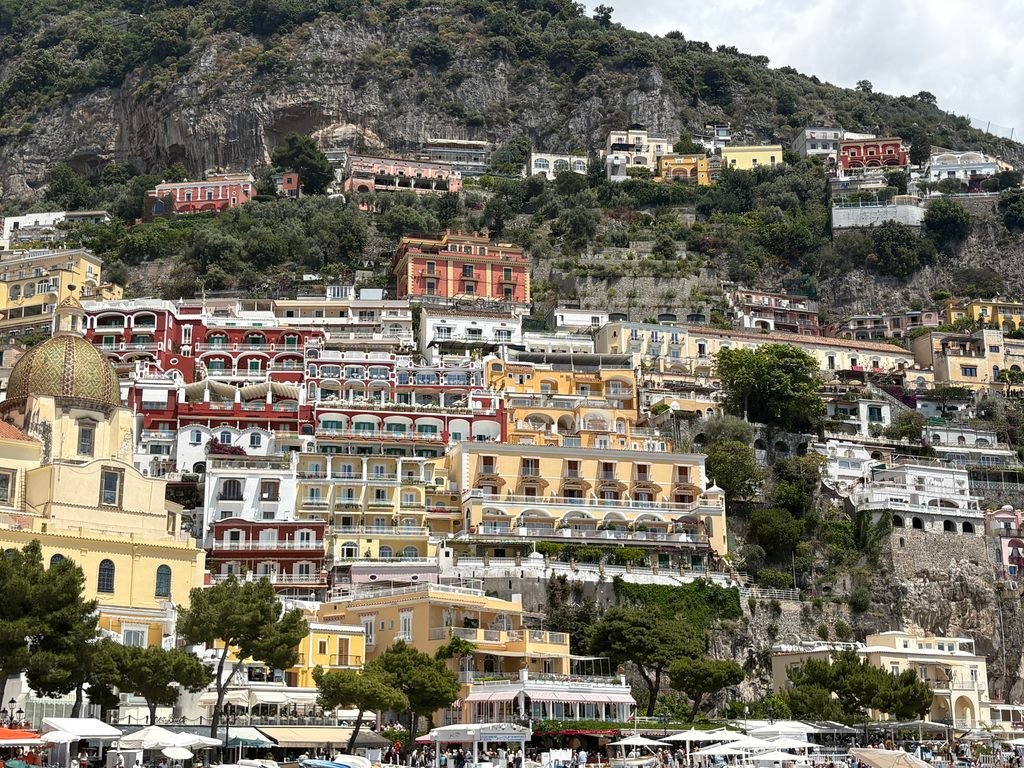
Amalfi still had plenty to offer after the hike
Back in Amalfi, I had an enormous lemon gelato, visited the Duomo in the main square and did some shopping before returning to the Airbnb for a rest.

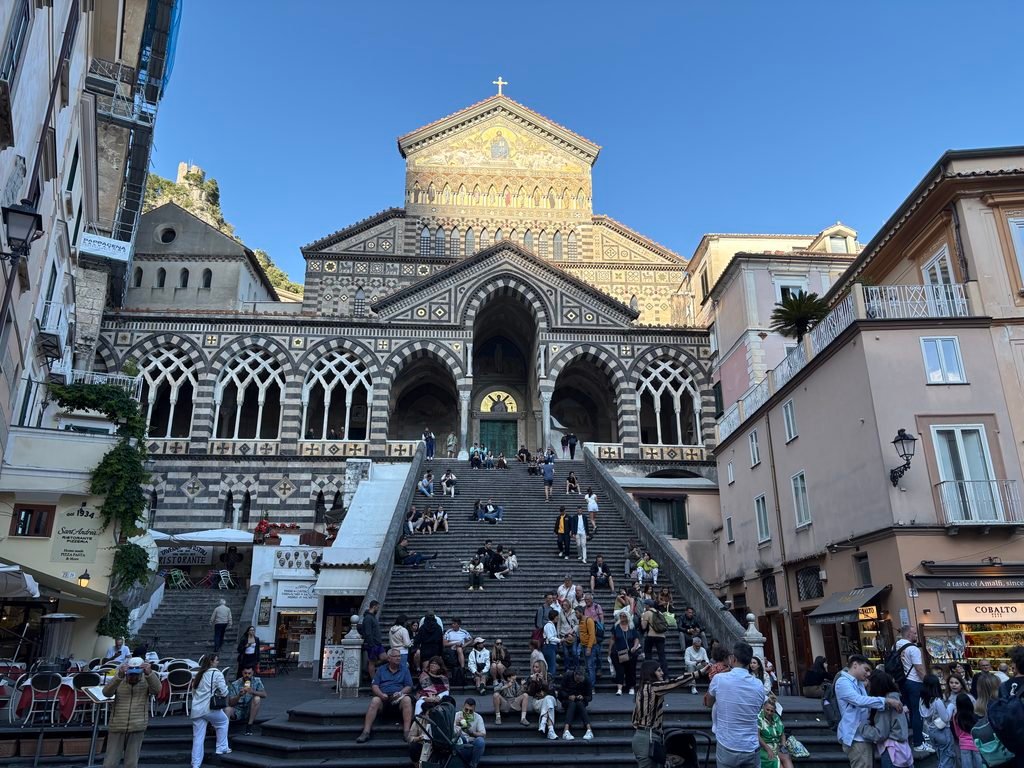
Later, I walked to Atrani. It is an easy and beautiful walk along the shoreline, just around the corner from Amalfi, and was exactly the kind of low-effort exploring I wanted after the hike. I wandered briefly through the town, took some photos and returned to Amalfi through the pedestrian tunnel.
For dinner, I ordered a €16 pizza from Pizzeria Donna Stella. The restaurant has a lovely outdoor seating area beneath lemon trees, and if I had been travelling with someone else I probably would have waited the 45 minutes or more for a table. Travelling solo, taking the pizza back to the Airbnb with a drink sounded better.
My first evening in Amalfi had been similarly simple. After arriving from Capri and checking in, I wandered the town, shops and beach area, then had dinner and drinks at Bar Della Valle for €26.50.
Those two nights were right for what I wanted to do. The hike was the anchor, but there was still enough room around it to enjoy Amalfi, Positano and Atrani without turning every hour into a scheduled activity.
Was Amalfi Town the right base?
For this trip, yes. It was central, well connected by ferry and bus, manageable with luggage and convenient for the activities I had chosen.
I could easily stay in Amalfi again on a future trip if those same logistics mattered. I might also choose somewhere quieter simply because I have already experienced the town itself. The decision would depend on what I wanted the next trip to be.
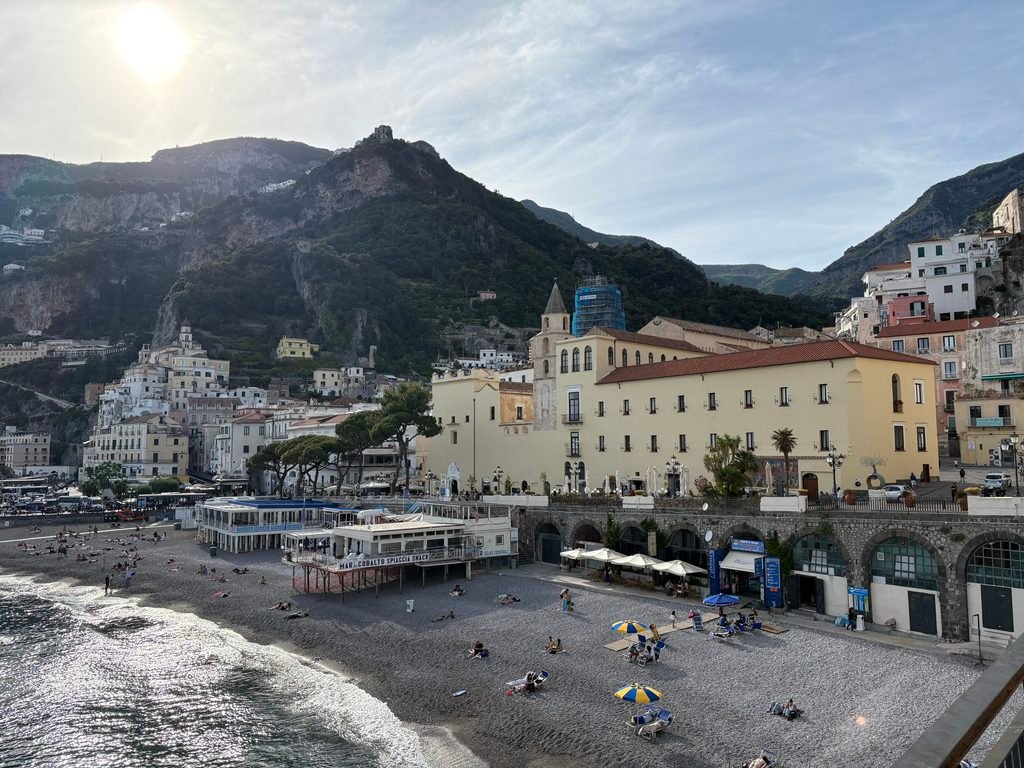
I would probably not choose Positano for myself. It was beautiful, but the crowds and narrow streets did not suit what I wanted from the coast. Ravello, however, is somewhere I would deliberately add to a future itinerary — as somewhere to visit, not somewhere I would personally use as the base for this kind of trip. I would also be interested in hiking one way if the route and timing made sense.
With one more day, Ravello and another hike from Amalfi would be high on my list.
Why Naples got the final night
The final night in Naples had a practical purpose: protecting my 9 a.m. flight home.
I took the noon Positano Jet ferry from Amalfi to Naples for €32, including my bag, and though I had considered buying the ticket in advance, when I asked at the ticket booth in Amalfi, the woman there advised that buying it that same morning would be fine. I followed that advice and bought the ticket shortly before departure.
The crossing took roughly an hour and a half and was much calmer than my earlier ferry to Capri.
My accommodation was near Piazza del Plebiscito, close enough that I could walk there from the ferry terminal. Like many of the mid-range options I found in Naples, it was not a traditional large hotel but a private room within a residential-style building, with check-in handled partly by phone.
The location worked extremely well for such a short stay, and because I had no must-do list or real expectations for Naples — beyond eating pizza — I could simply walk and see where the afternoon took me.
I wandered through the historic centre, visited several churches and eventually headed toward the port and promenade, where the atmosphere felt much more open and modern. I ate at Gino e Toto Sorbillo in the centro storico and, appropriately, finished the Italy portion of the trip with gelato.
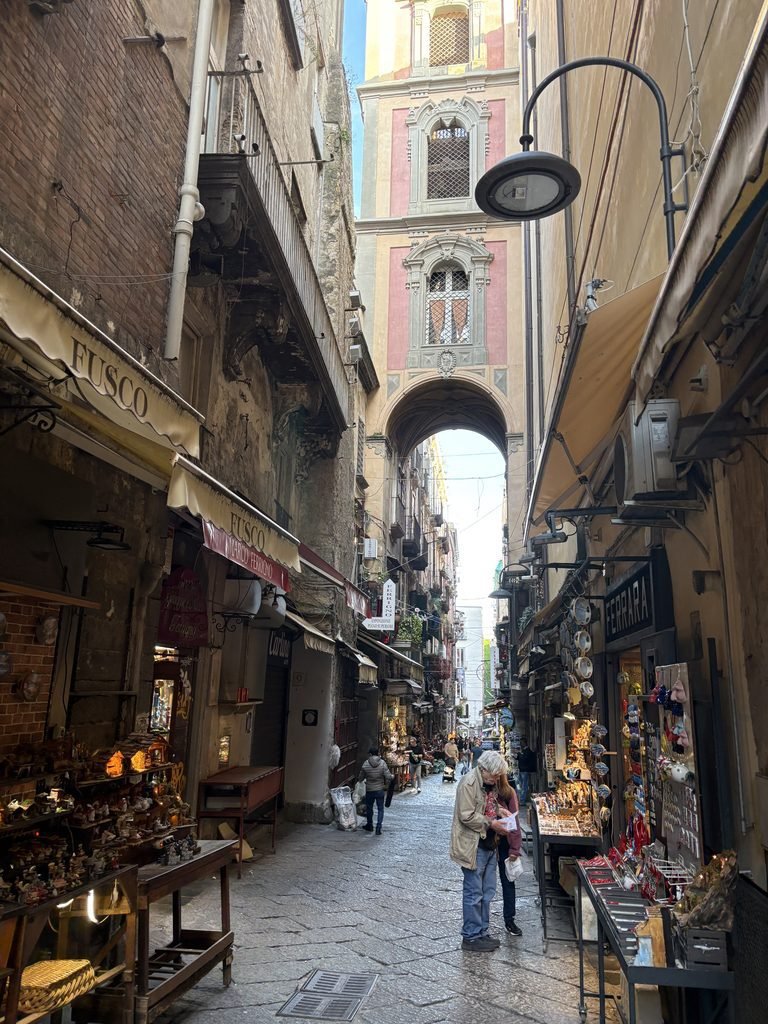
Naples felt grittier than some of the other Italian cities I had visited, but lively and interesting. I would return, particularly because it makes such a useful base for trains, flights and other places in the region. Personally, I would not necessarily allocate a large part of a future trip to Naples itself, but I only scratched the surface on this visit.
For these four nights, it did exactly what I needed: provided a safe buffer before the flight while still giving me an enjoyable afternoon and evening in the city.
Why I cut Pompeii
Pompeii was the biggest thing I seriously considered and ultimately removed.
The history appealed to me, as did the possibility of combining the archaeological site with hiking around Vesuvius. The problem was not whether those experiences were worthwhile; it was whether they fit this trip without making everything else rushed.
To include Pompeii comfortably, I think I would have needed either more nights in Naples — allowing me to take the train out with only a small daypack — or to stay closer to the archaeological sites themselves.
There is luggage storage available for travellers who want to stop at Pompeii while moving between destinations, and someone who prefers a faster itinerary could absolutely build the day that way. I did not want to spend this trip managing bags, storage and another fixed timeline simply to add one more important place to the list.
Saving Pompeii for a future trip felt much more satisfying than forcing it into this one.
What I would do with one more night
With the same four nights, I would keep the allocation exactly as it was:
Capri — 1 night
Amalfi — 2 nights
Naples — 1 night
If I had one additional night, it would most likely go to Amalfi. That would give me time for Ravello, another hike or simply a slower day on the coast without taking anything away from what already worked.
Capri would be the other possibility if hiking, nature and slower island exploration were the priority. Pompeii would make me reconsider the structure more substantially rather than simply adding it as another quick stop.
Would I recommend this route to everyone?
No. Four nights across three bases worked because I was travelling solo, fairly light and comfortable moving frequently for a short period. Whether that pace works for you depends a lot on how you travel.
With a family, I would make a different choice. On the same timeline, I would probably select either Capri or the Amalfi Coast as the main base for three nights, followed by the necessary Naples night before the flight.
Every hotel change has a cost: packing, checking out, reaching the ferry, managing luggage, finding the next accommodation and settling in again. When you are managing only yourself, that cost can be relatively small. With several people, it multiplies quickly.
Four nights gave me a taste, not a complete trip
I did not visit Pompeii or Ravello. I left walking routes unfinished on Capri, skipped other hikes around Amalfi and barely scratched the surface of Naples.
That was okay.
The four nights gave me an overnight on Capri, an extraordinary day hiking above the Amalfi Coast, enough time to enjoy Amalfi rather than simply pass through it, and an unhurried buffer in Naples before the flight home.
More importantly, they showed me what I would want to come back for.
If I had more days, I would add them gladly. If I had fewer, I would cut a base rather than try to move faster.
The goal was never to see the region properly in four nights. It was to use the time I had well enough to experience something meaningful — and leave with a good reason to return.
More from this trip
- Is Staying Overnight in Capri Worth It?
- How to Hike the Path of the Gods from Amalfi: Bus, Trail and Return Logistics
- Italy by Train and Ferry: Strikes, Connections and How Much Buffer to Leave
- Why I Chose Amalfi Town as My Base
Plan your own trip
Know How You Travel
Understand how pace, comfort and the number of hotel changes fit the way you travel.
Plan Your Trip
Build a route around the time, priorities and logistics that actually matter.
Explore more of Italy
Planning more of Italy? Explore our firsthand articles and practical advice from Rome, Capri, the Amalfi Coast and Naples.